Meural Canvas
In this guide, we'll take you through how to hang, connect, and control your Canvas.- 1. Getting started
- 2. Hanging and assembly
- 3. Using your Canvas
Hanging your Canvas
We recommend starting up your Canvas once before hanging it. If you’re hanging your Canvas on drywall, you may want to recruit a partner— hanging art is always easier with two people. (If you want to hang your Canvas on a different type of wall, your hanging process may differ.)
Choose where to put your Canvas
We recommend hanging your Canvas about 60 inches high on a wall with at least 2 square feet of clear space. Choose a spot with access to a nearby power outlet; the power cable is 8 feet long.You can also lean your Canvas on a table or set it on an easel.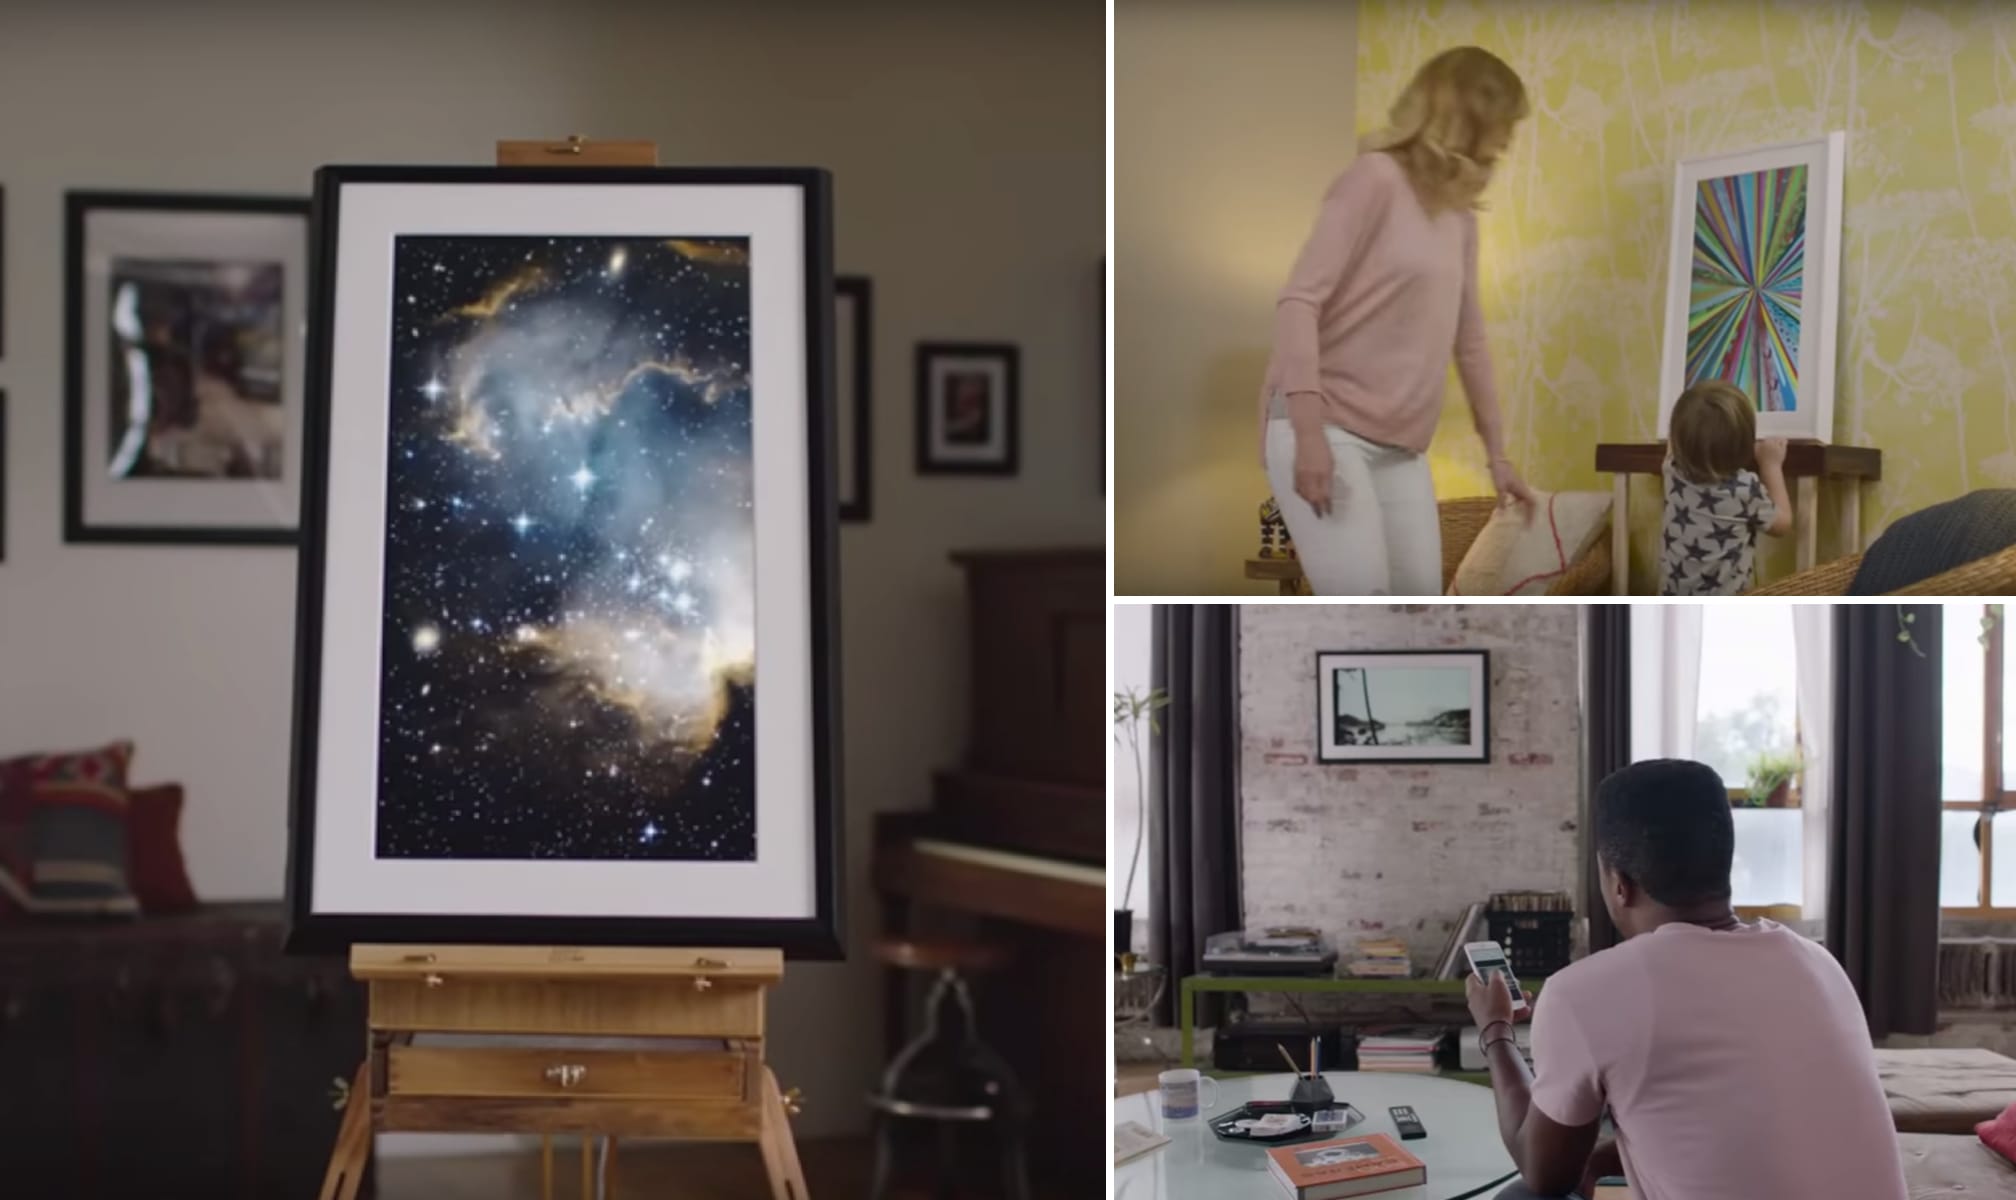
Advanced setup
Some choose to hide the power cord completely. Setting up this way can be more difficult and should be done by a professional. Please check with your electrician before running any cables inside of your wall. This can be done in a few ways:1. Hide the cord behind furniture or plants2. Run the power adapter behind the wall
Frames on Meural Canvases are integrated with the product and are not meant to be removed, swapped or changed. Therefore we do not recommend changing the frames on any Meural Canvases. Any damage to your Canvas that occurs while attempting to remove, reinstall, or change a frame is not covered by your product warranty.1Hanging with the standard mount
Step 1: Gather your supplies
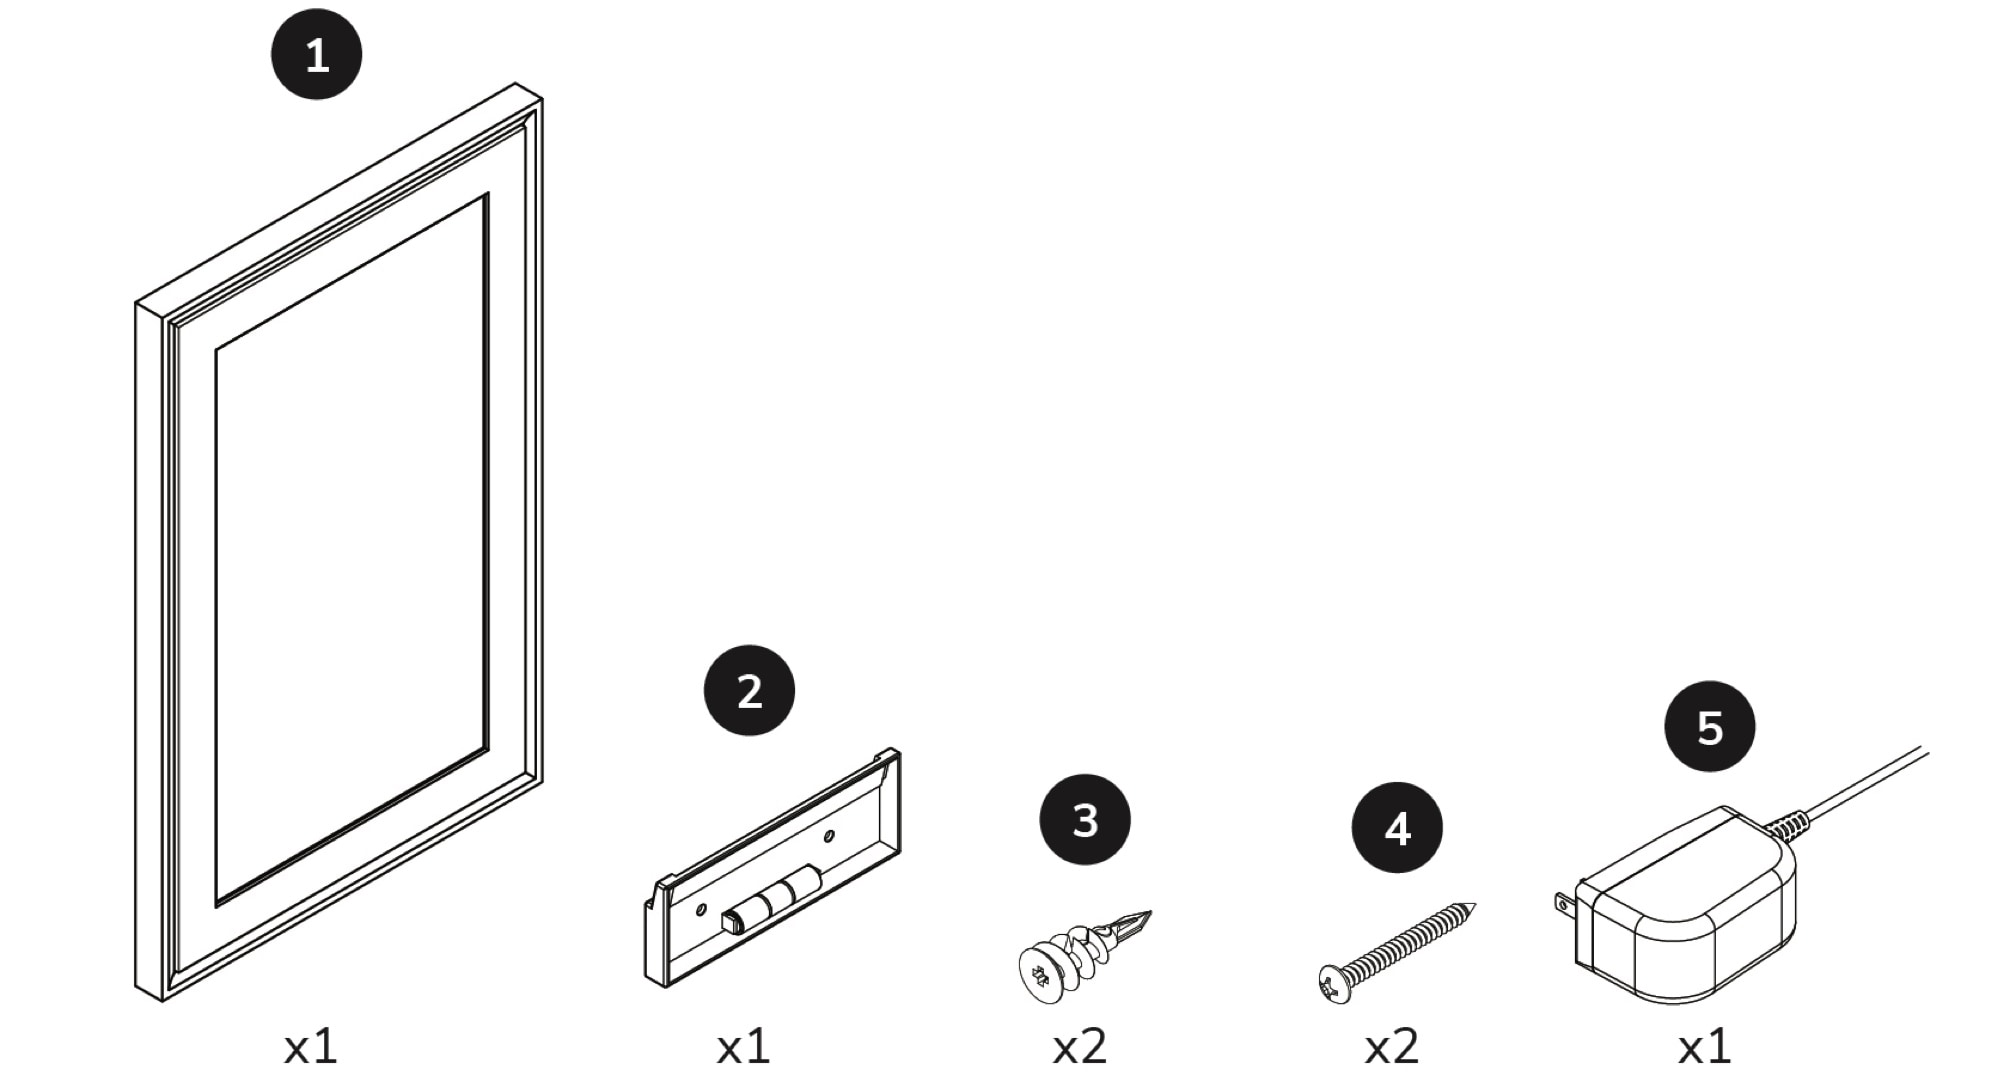
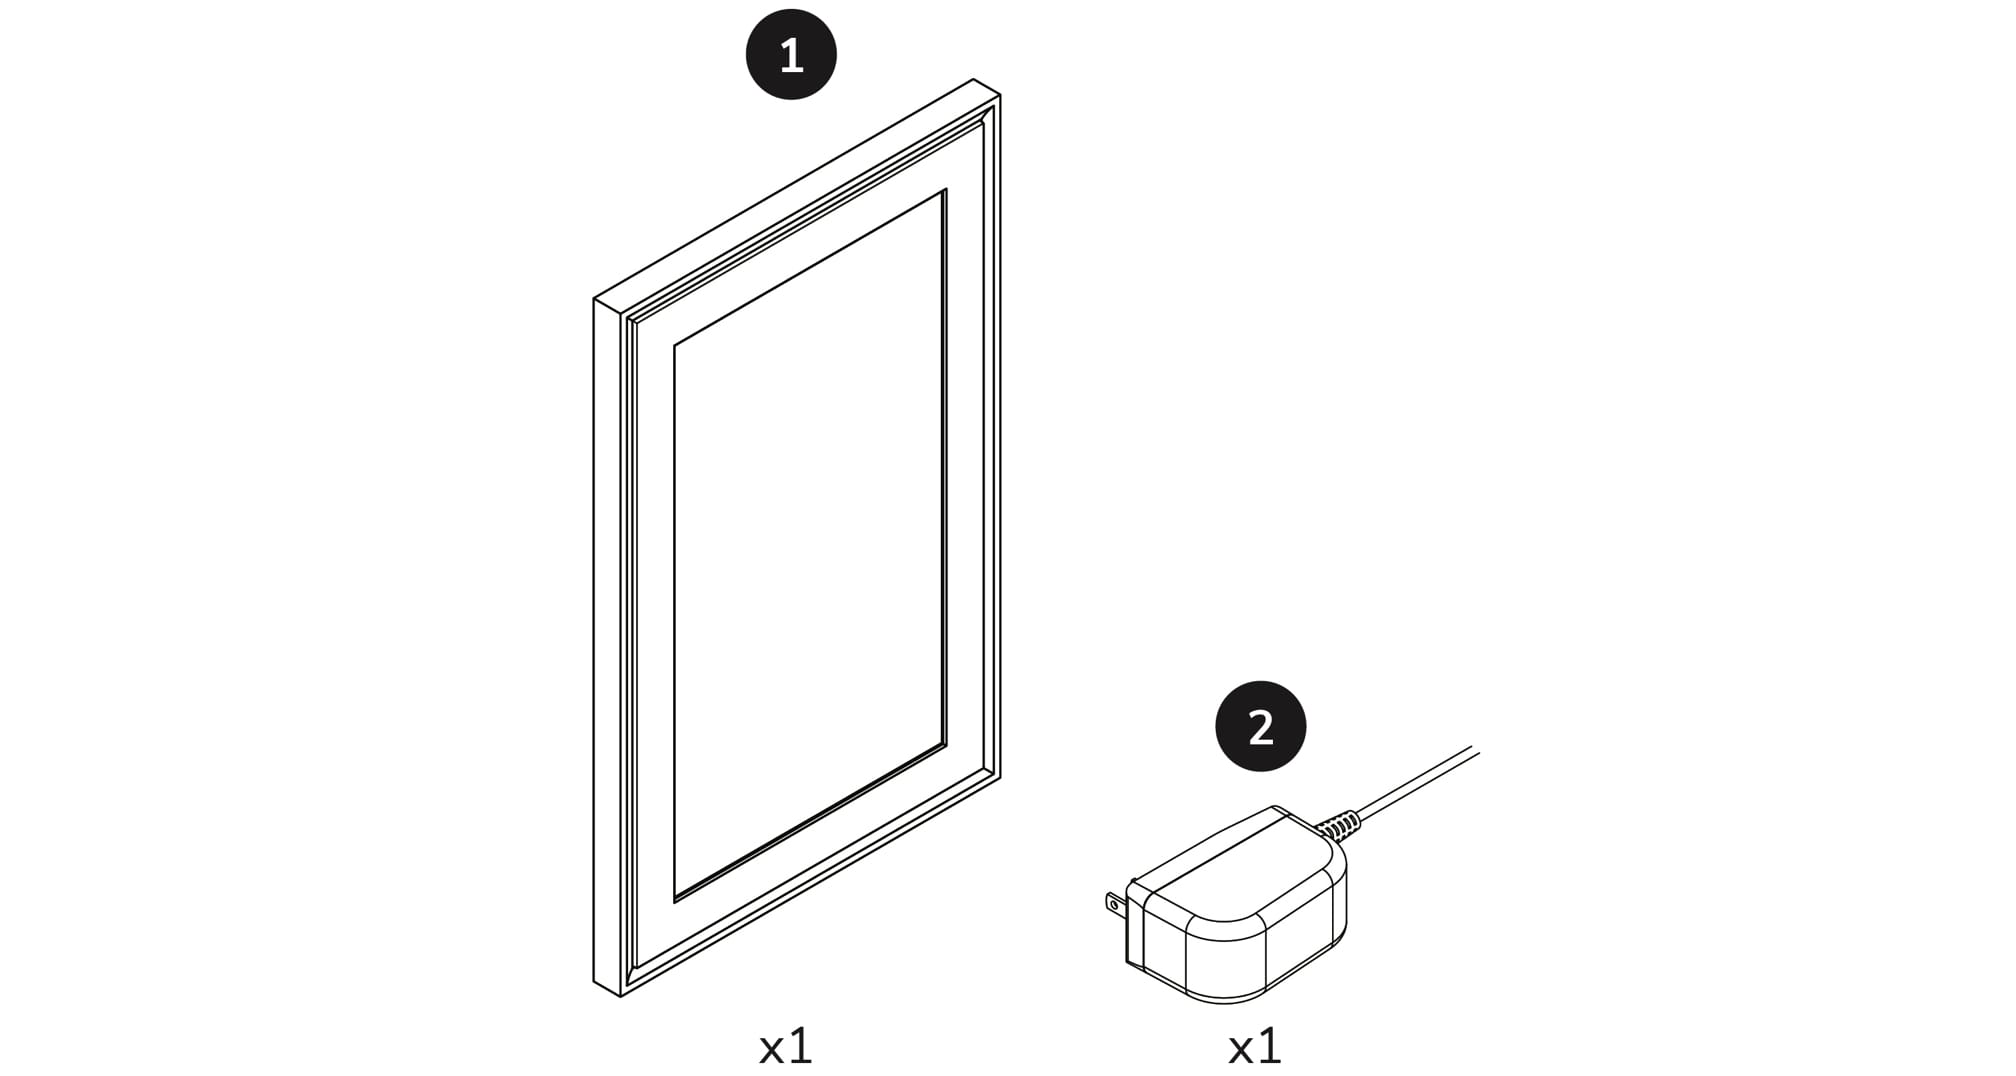
You’ll need to get the following materials out of the box your Canvas came in:1. Meural Canvas2. Hanging cleat3. Drywall anchors (2x)4. Anchor screws (2x)5. Power adapter
You'll also need these tools: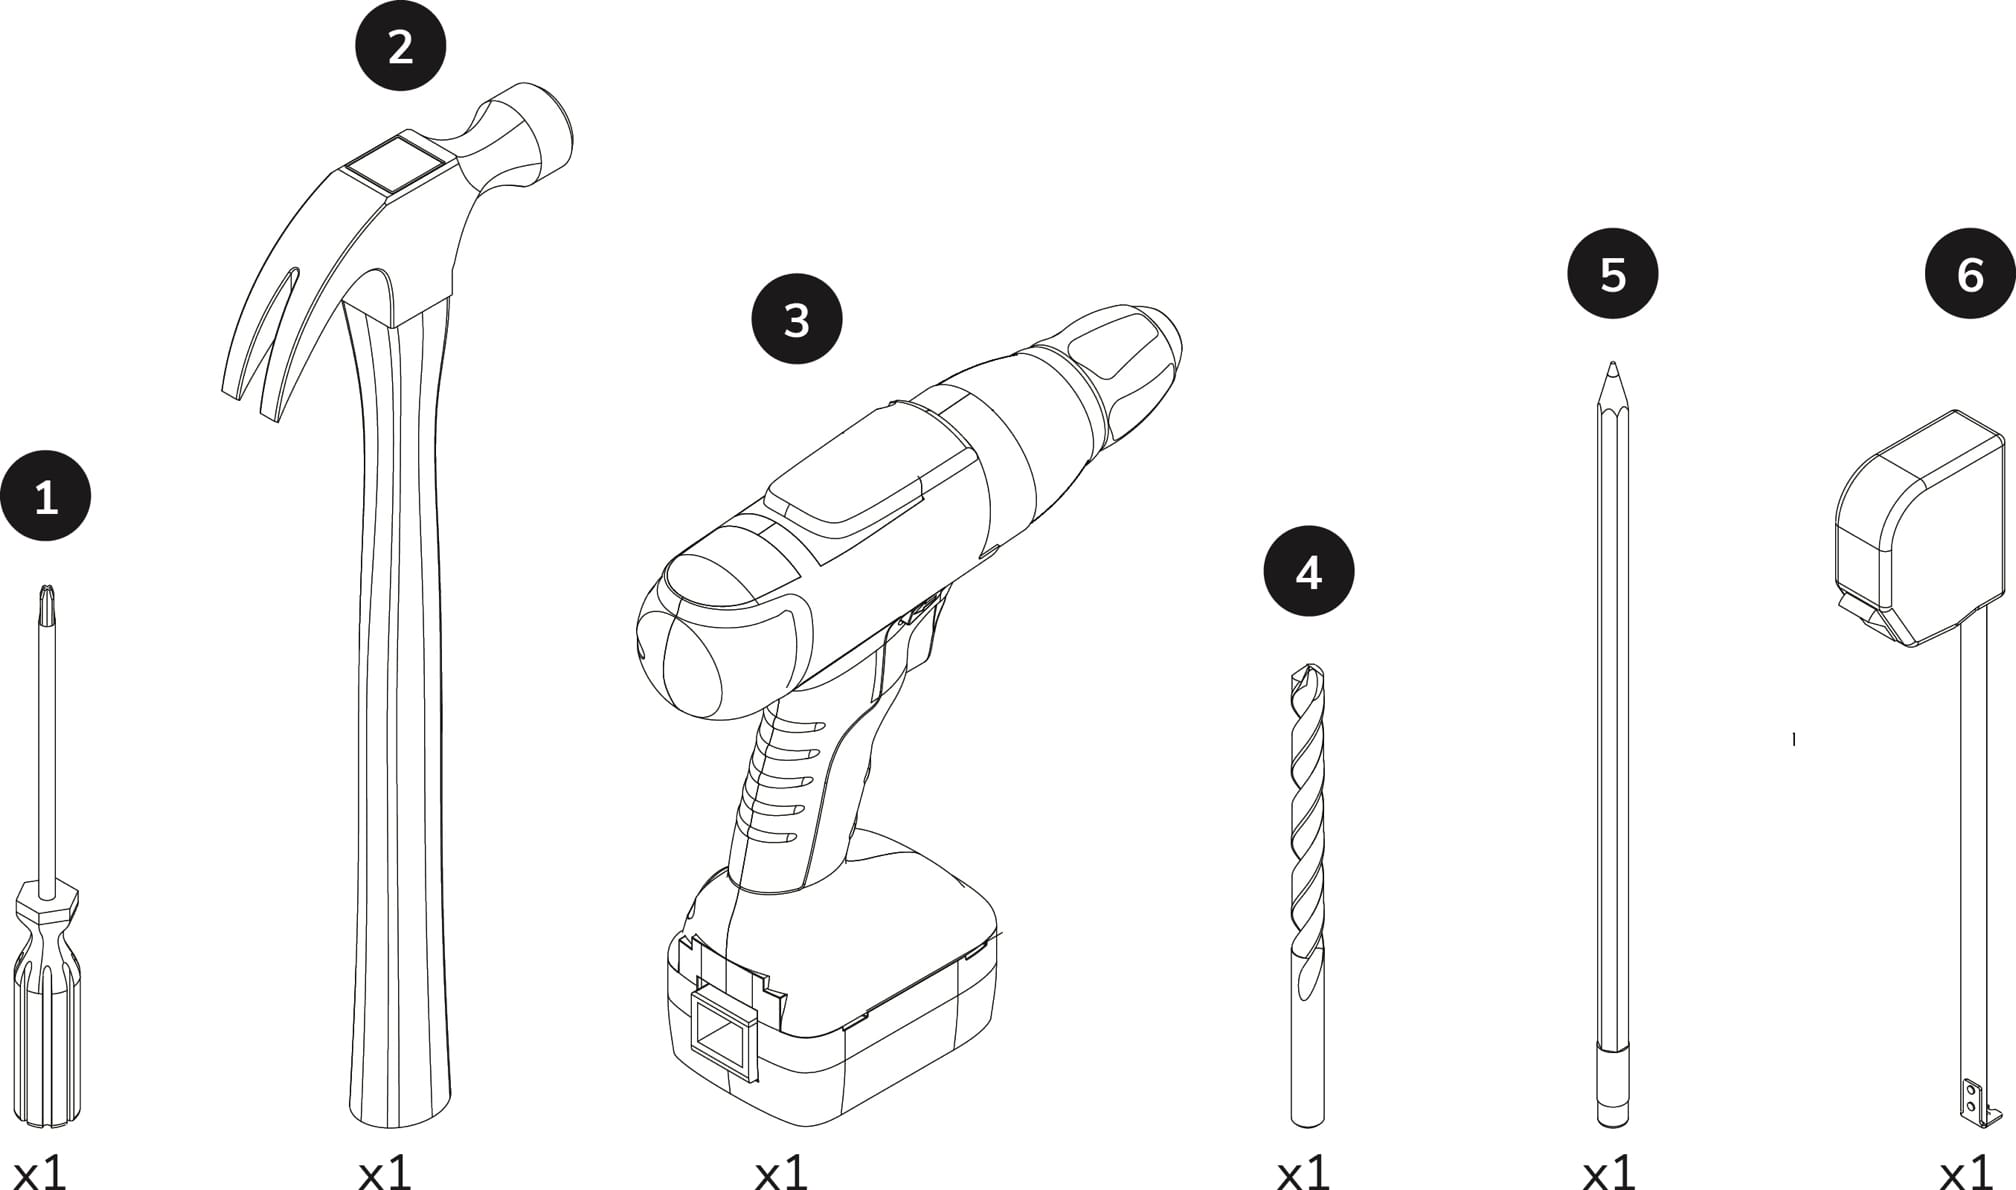
1. Phillips head screwdriver2. Hammer3. Power drill4. ⅜” drill bit5. Pencil6. Tape measure
Step 2: Measure
After you choose a spot to hang your Canvas, use your tape measure and pencil to mark the desired height from the floor. We recommend hanging the Canvas so its center is at around 60 inches from the floor—the gallery standard.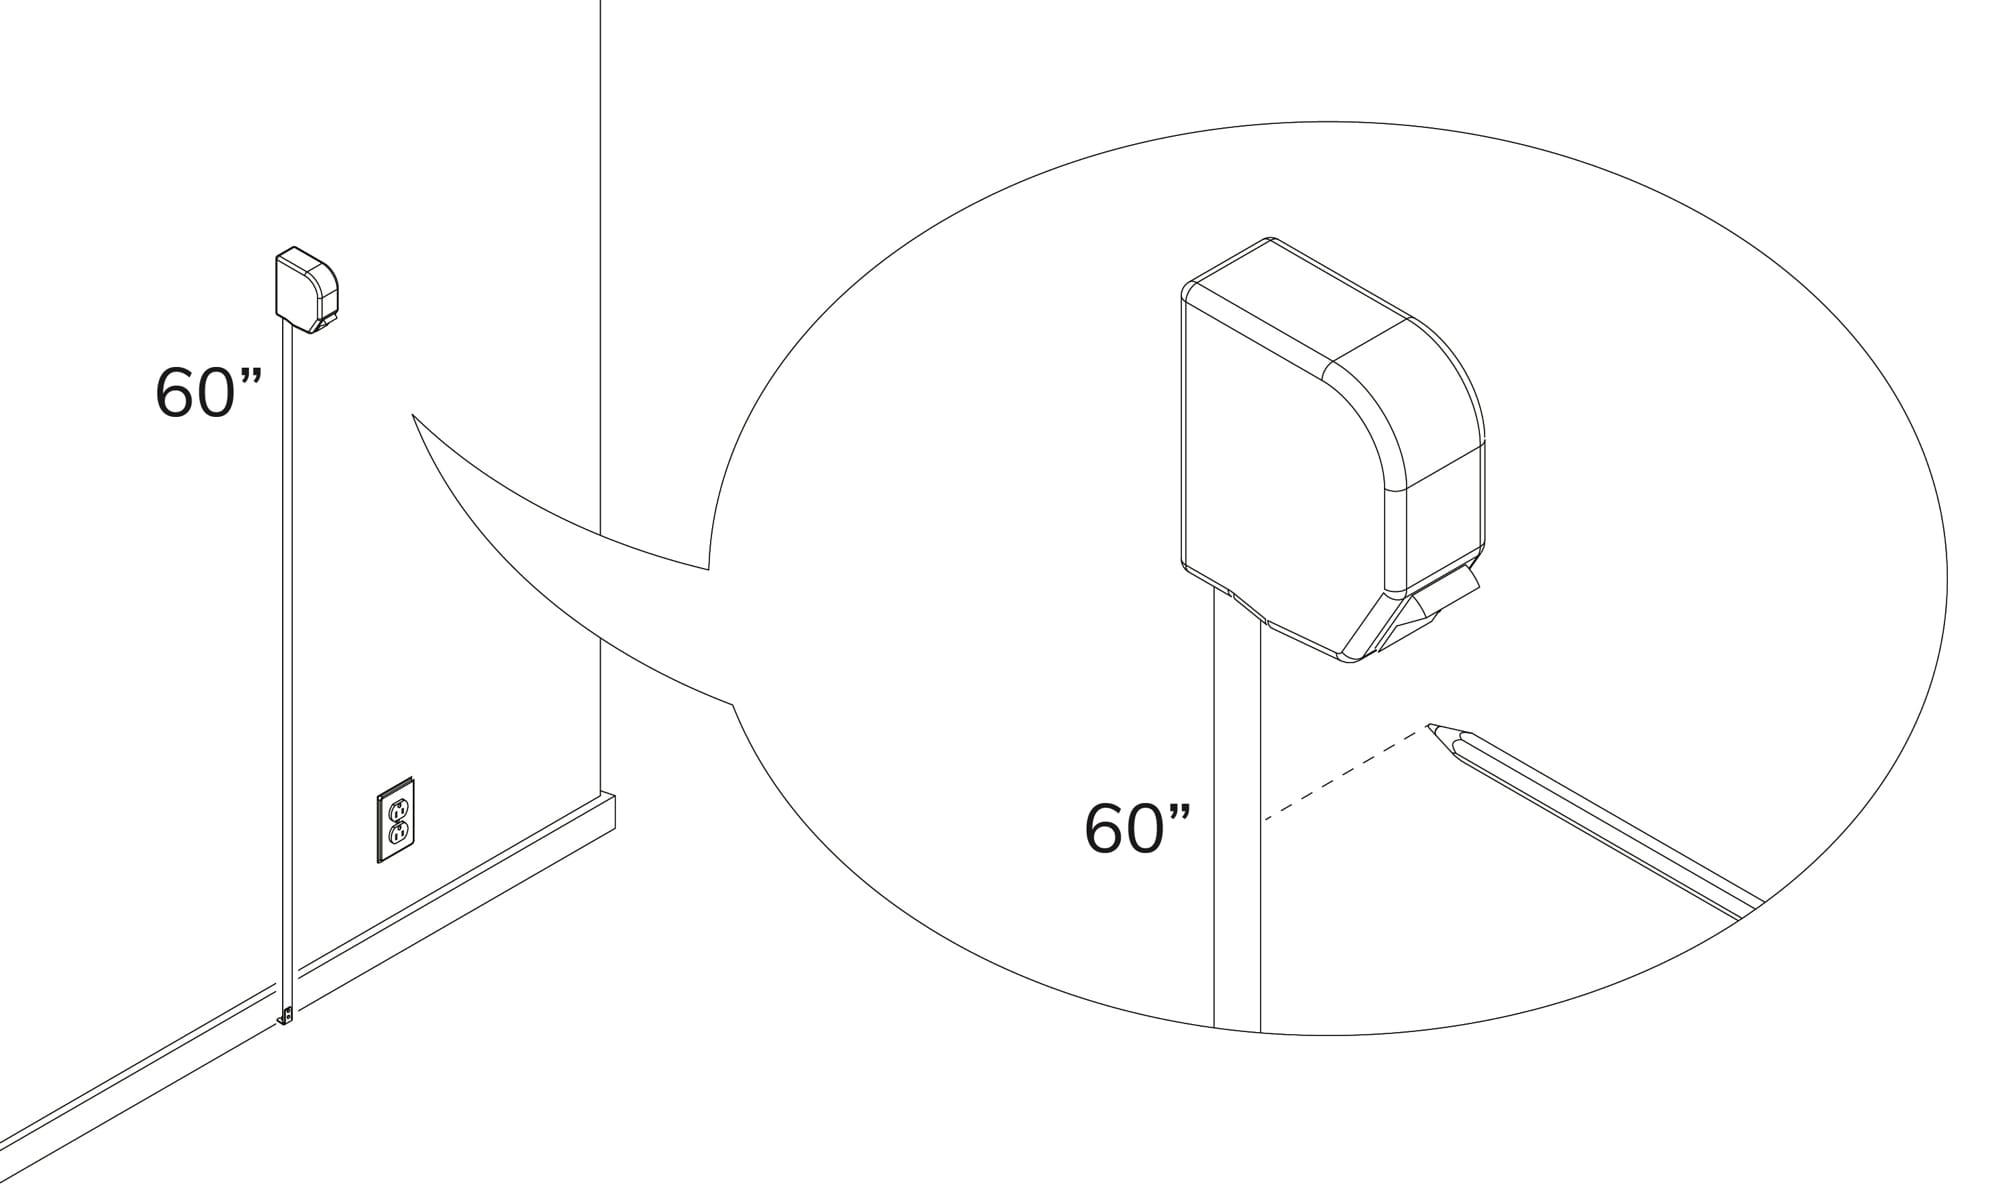
Step 3: Place your cleat
Place your cleat against the wall and align the holes over your mark. Use the included bubble level to make sure the cleat is level.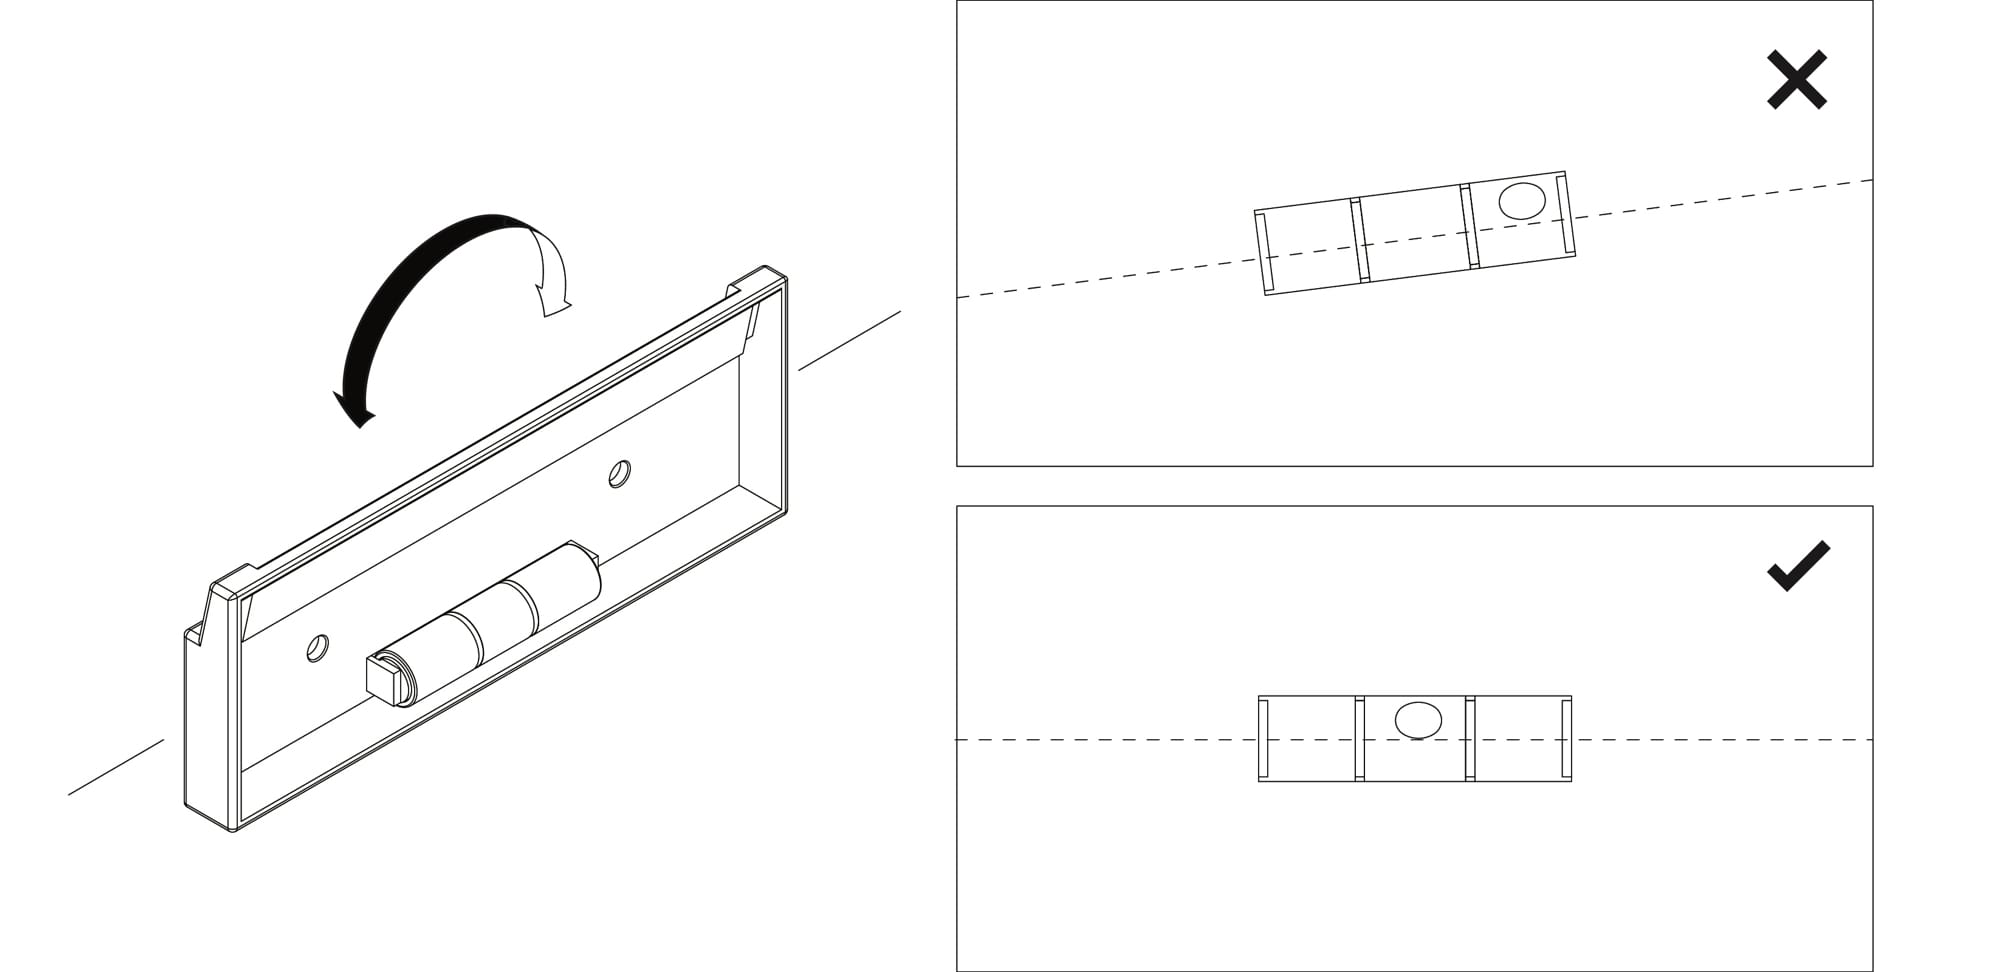
Step 4: Mark the holes
Use your pencil to mark the center of the holes. Once you’ve marked the holes, set the pencil and hanging cleat aside.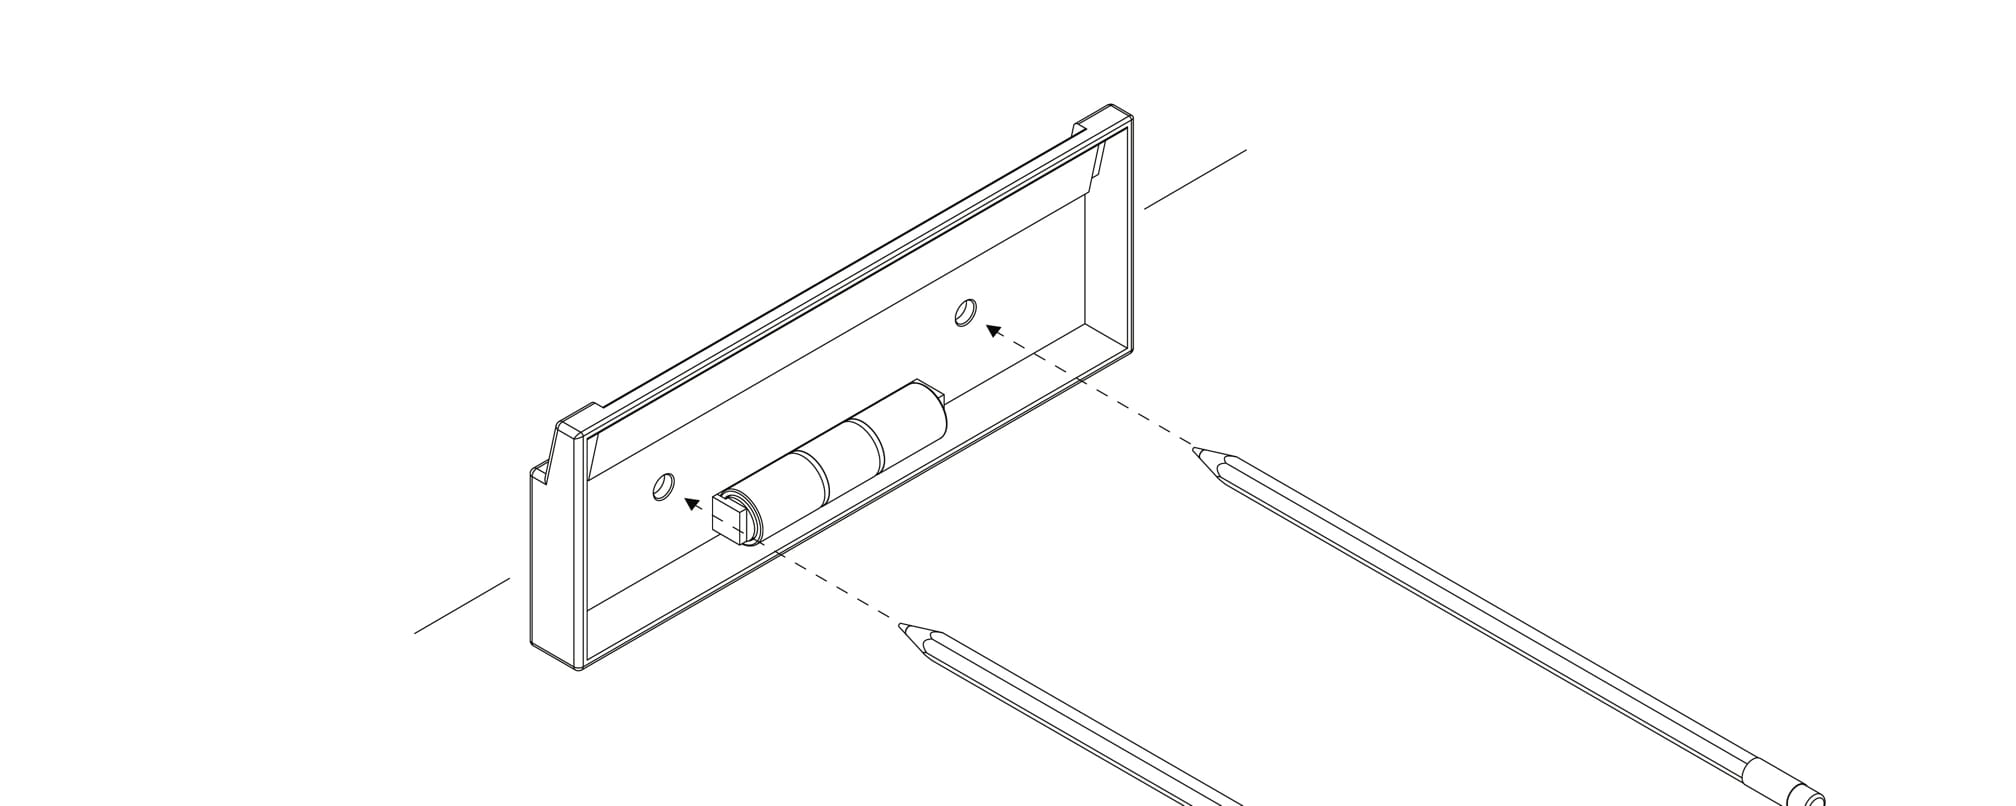
Step 5: Drill the holes
Use a drill with a ⅜ inch drill bit to drill the holes centered on the two pencil marks. You’ll need to drill about 2 ½ inches deep (or all the way through the drywall).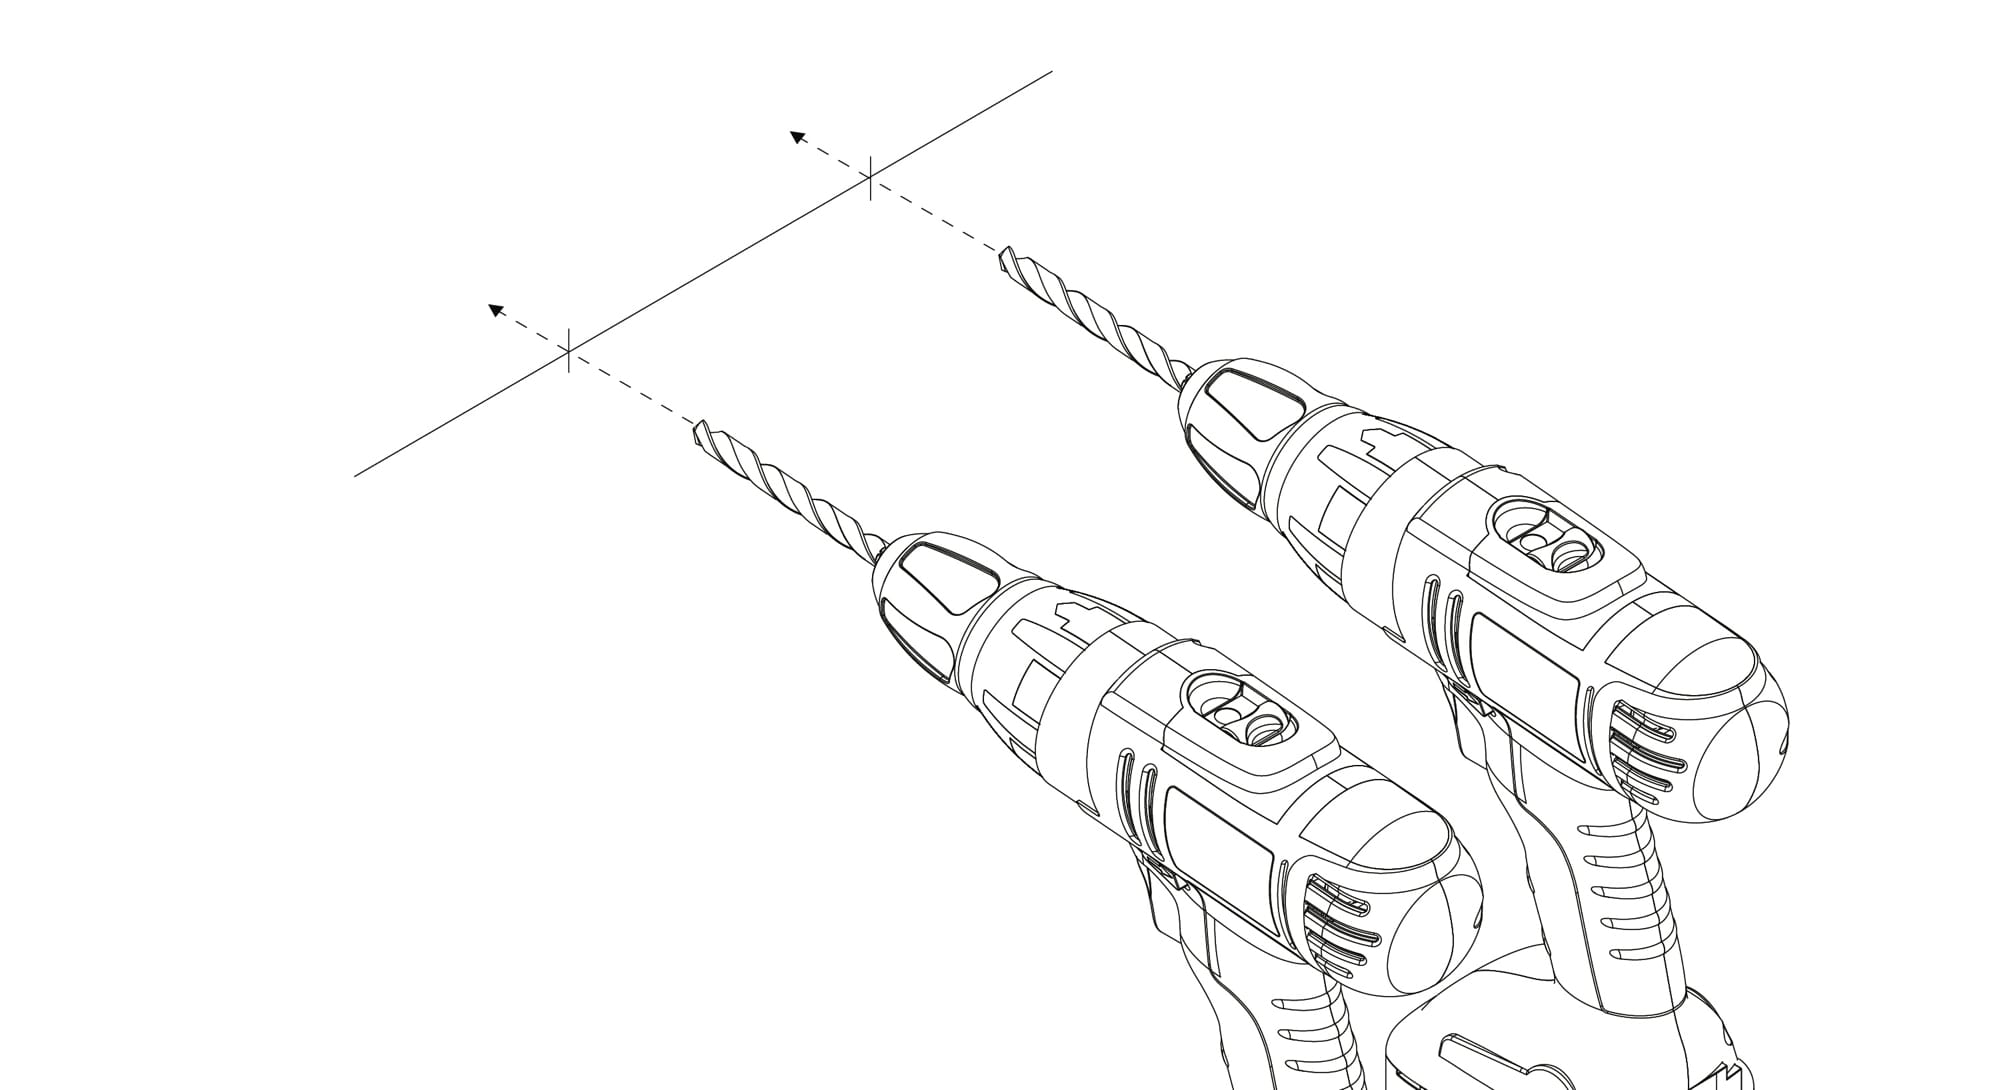
Step 6: Insert the anchors
Using a hammer, gently tap the two included anchors all the way through the two holes.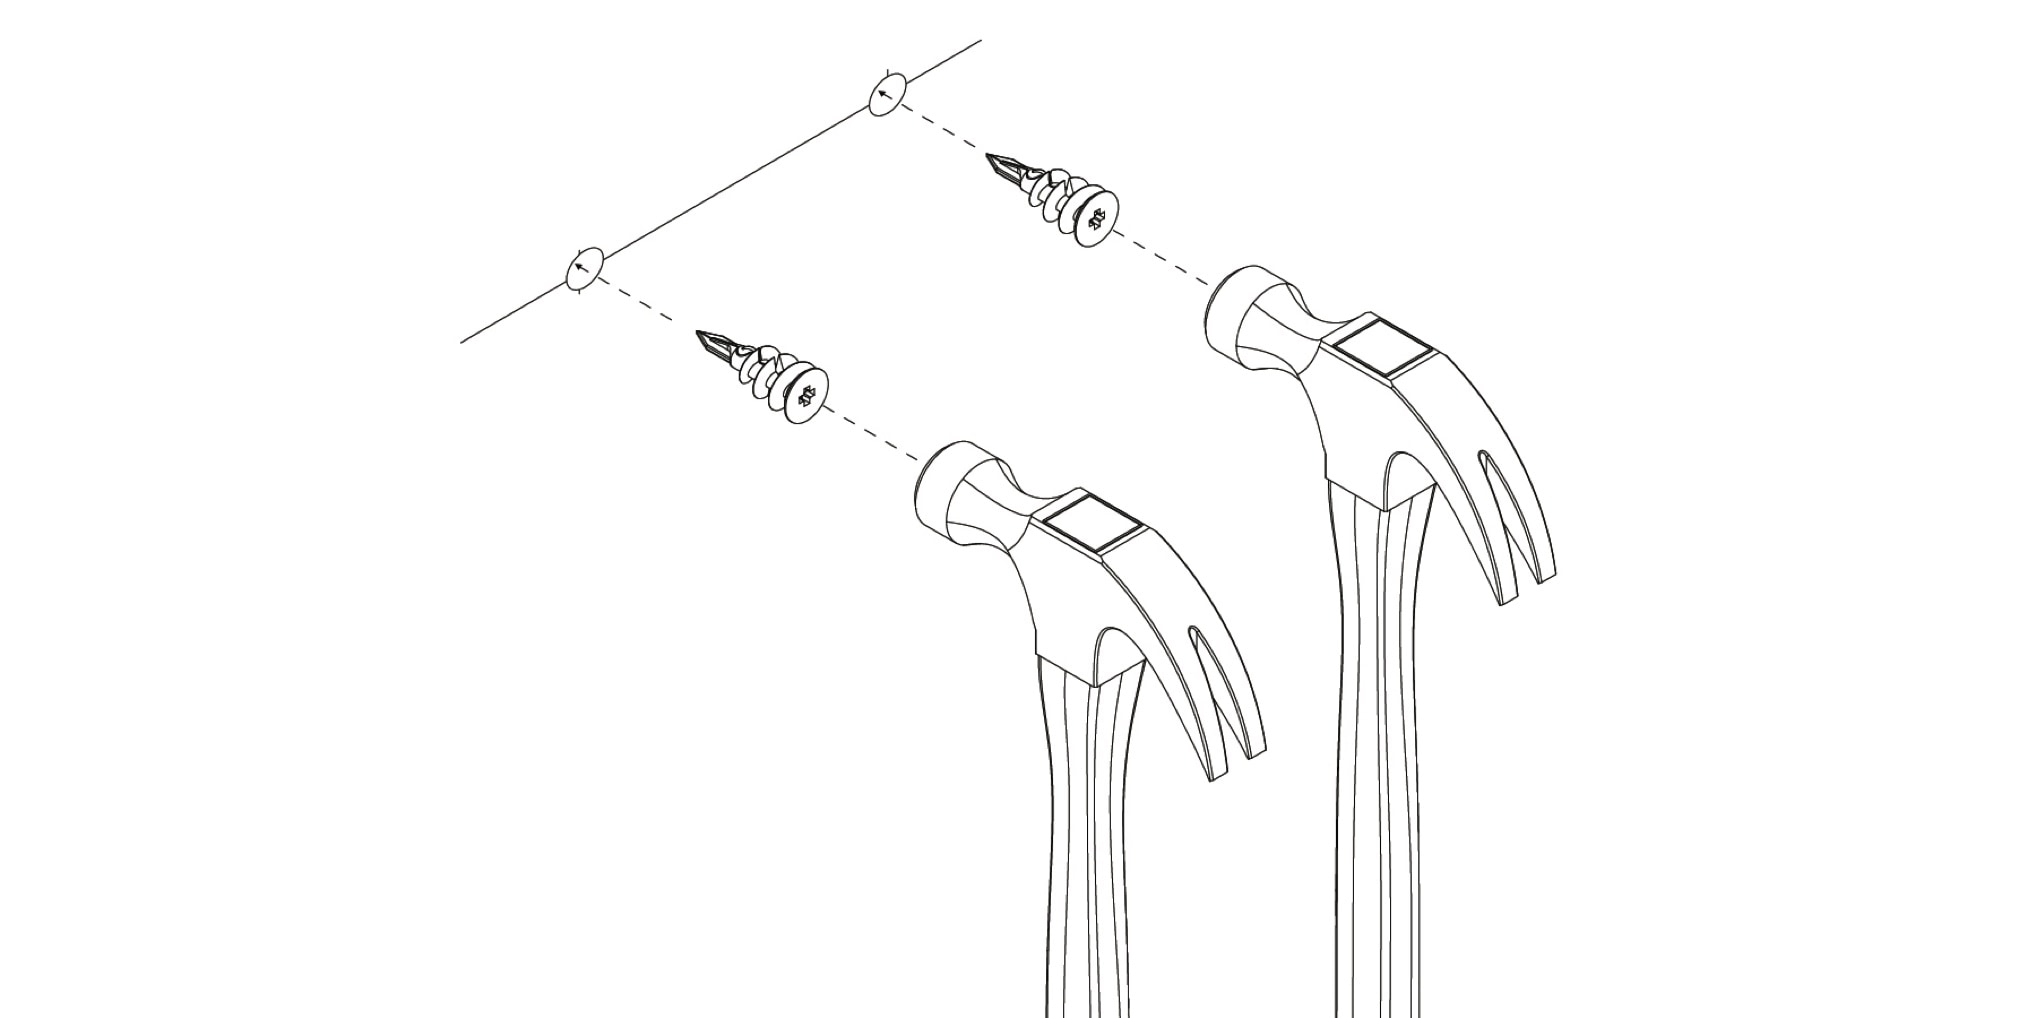
Step 7: Install the cleat
Position the cleat with the holes aligned with the anchors. Make sure the position of the cleat matches the diagram below. Using a Phillips head screwdriver, screw the screws through the holes in the cleat into the anchors.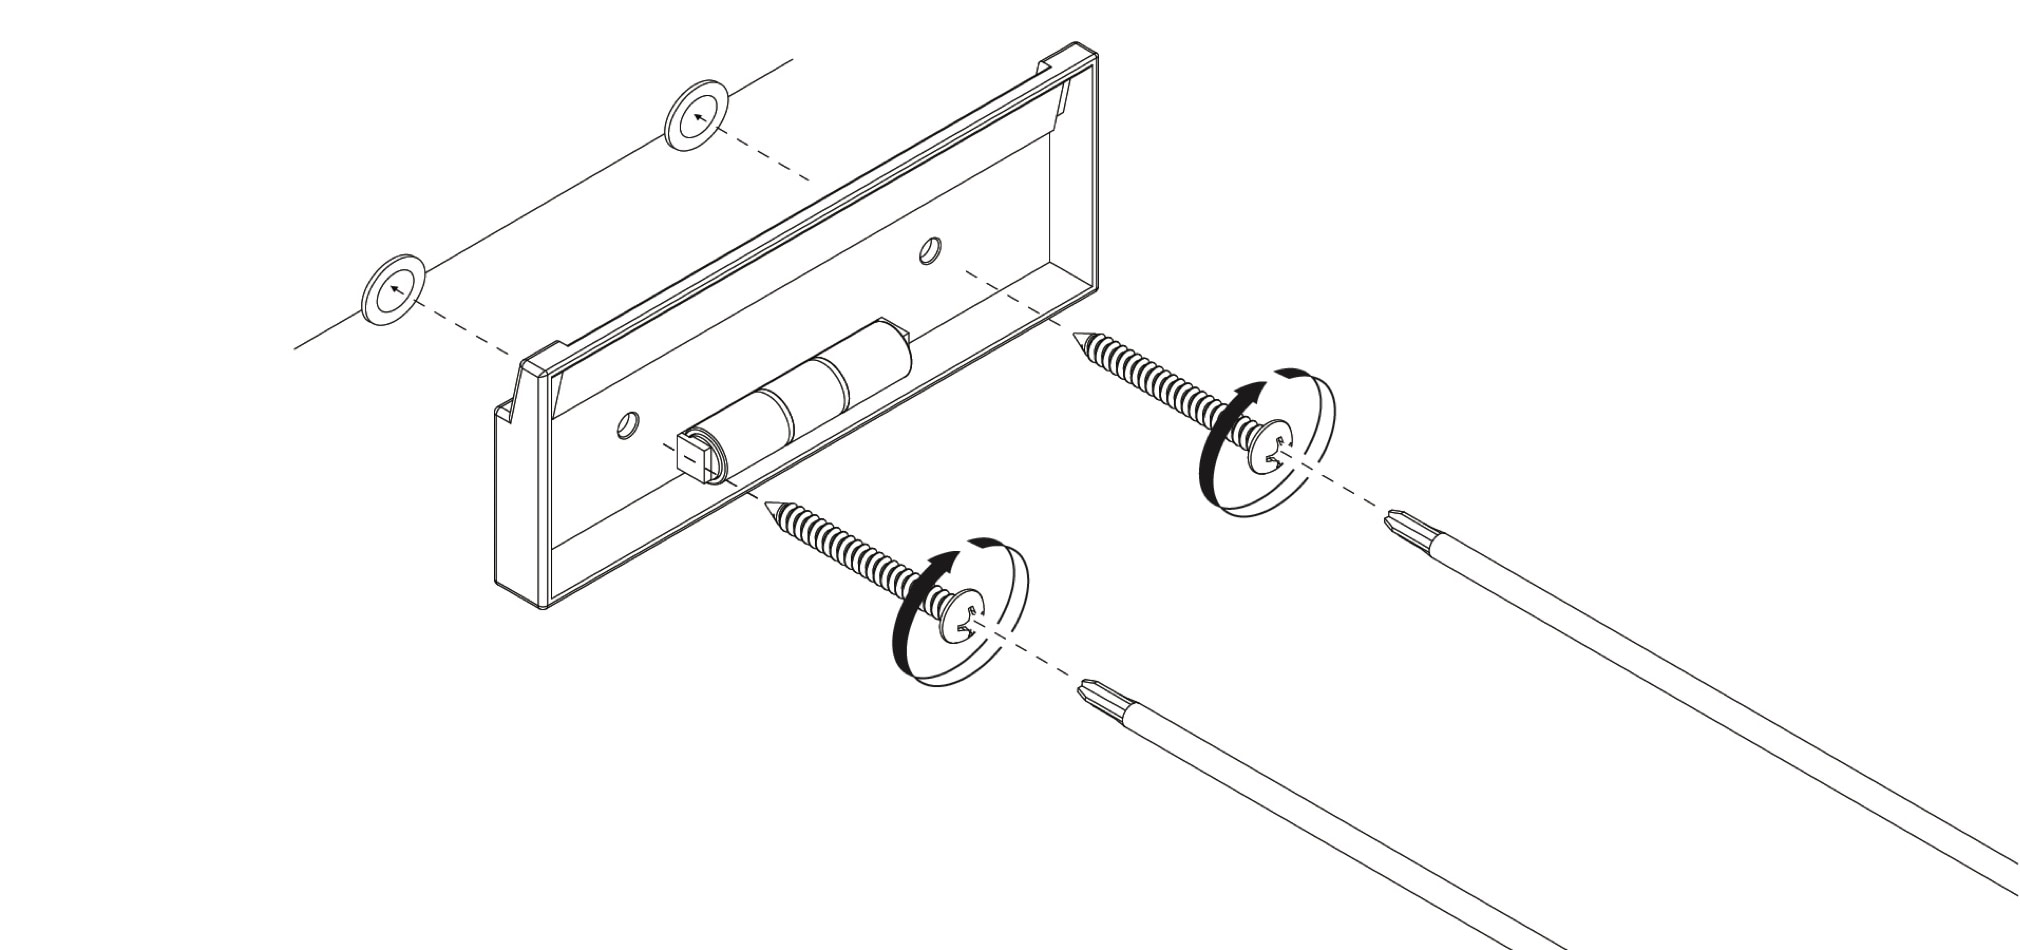
Step 8: Plug in the Canvas
Lean the Canvas up against a wall or chair with the back facing you. Gently press the tab on the back of the Canvas and remove the plastic door.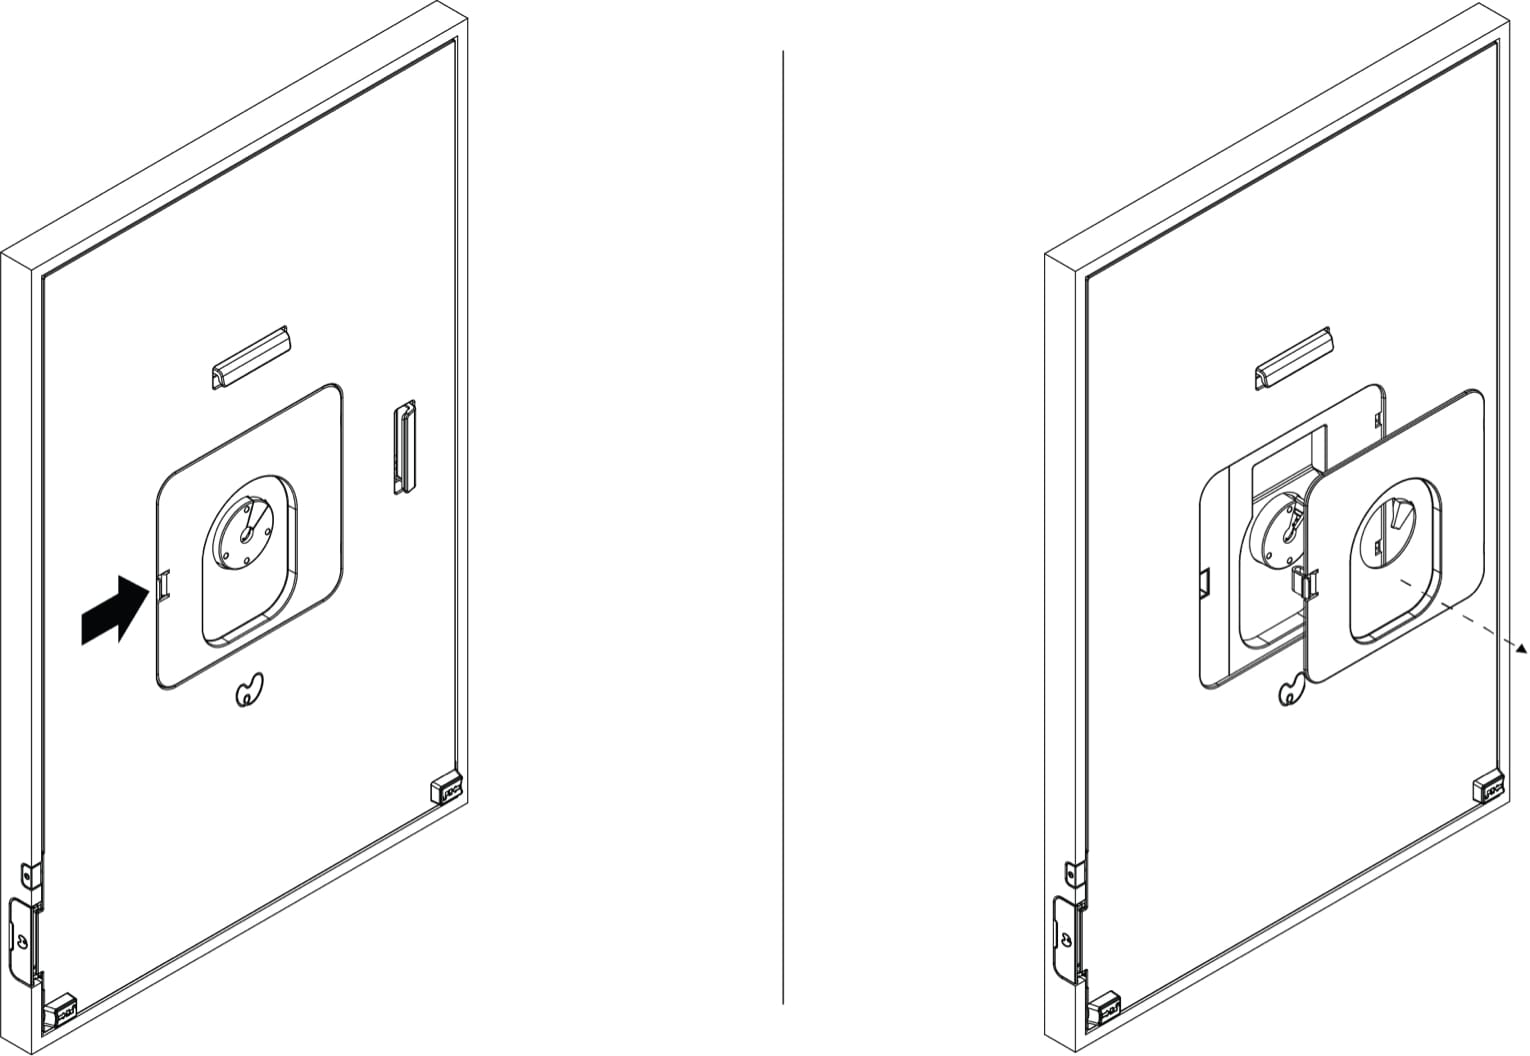
Run the small end of the cord through the hole in the plastic door. Plug the small end of the included power adapter into the hole indicated in the diagram.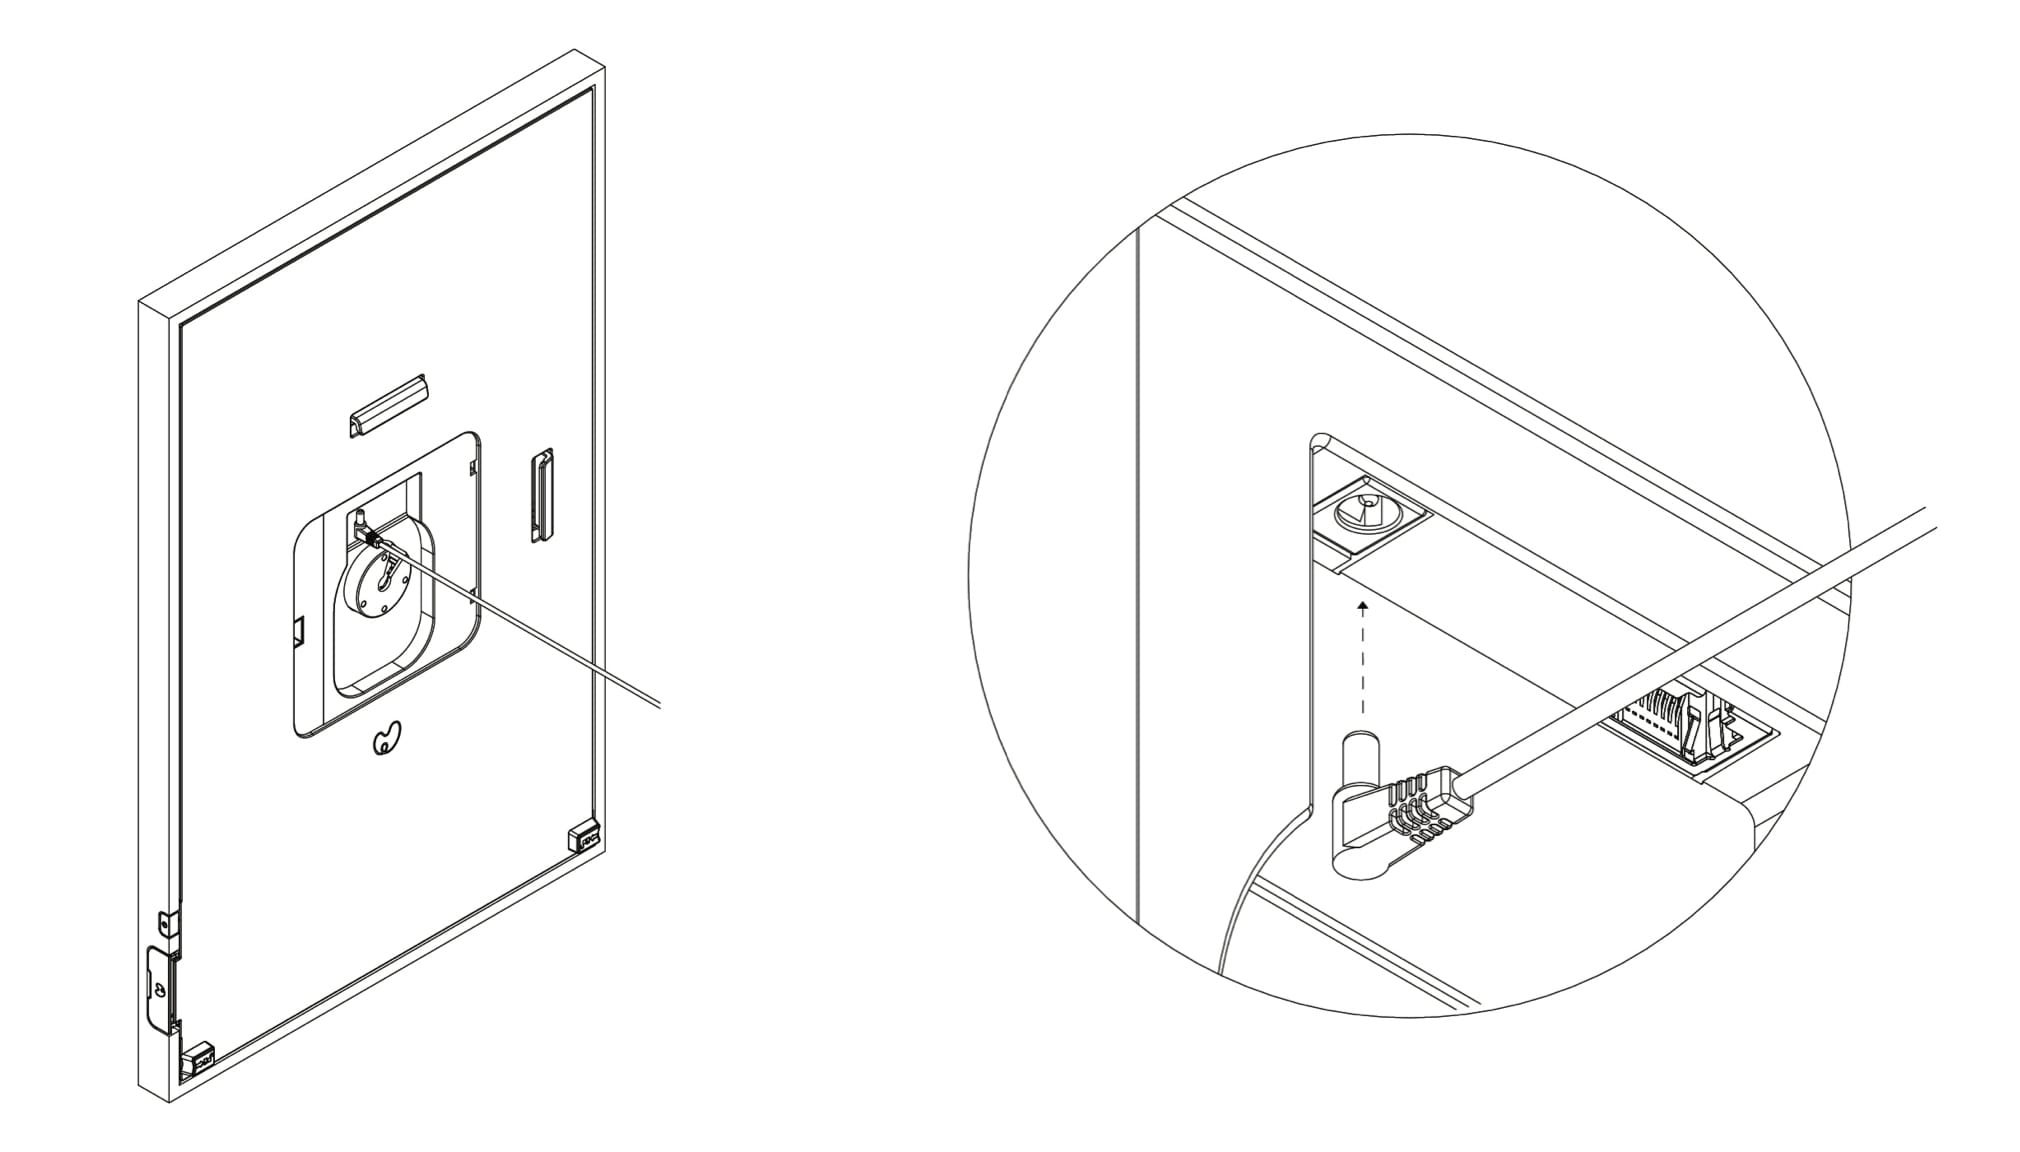
Position the cord so that it runs through the V-shaped opening in the center of the Canvas.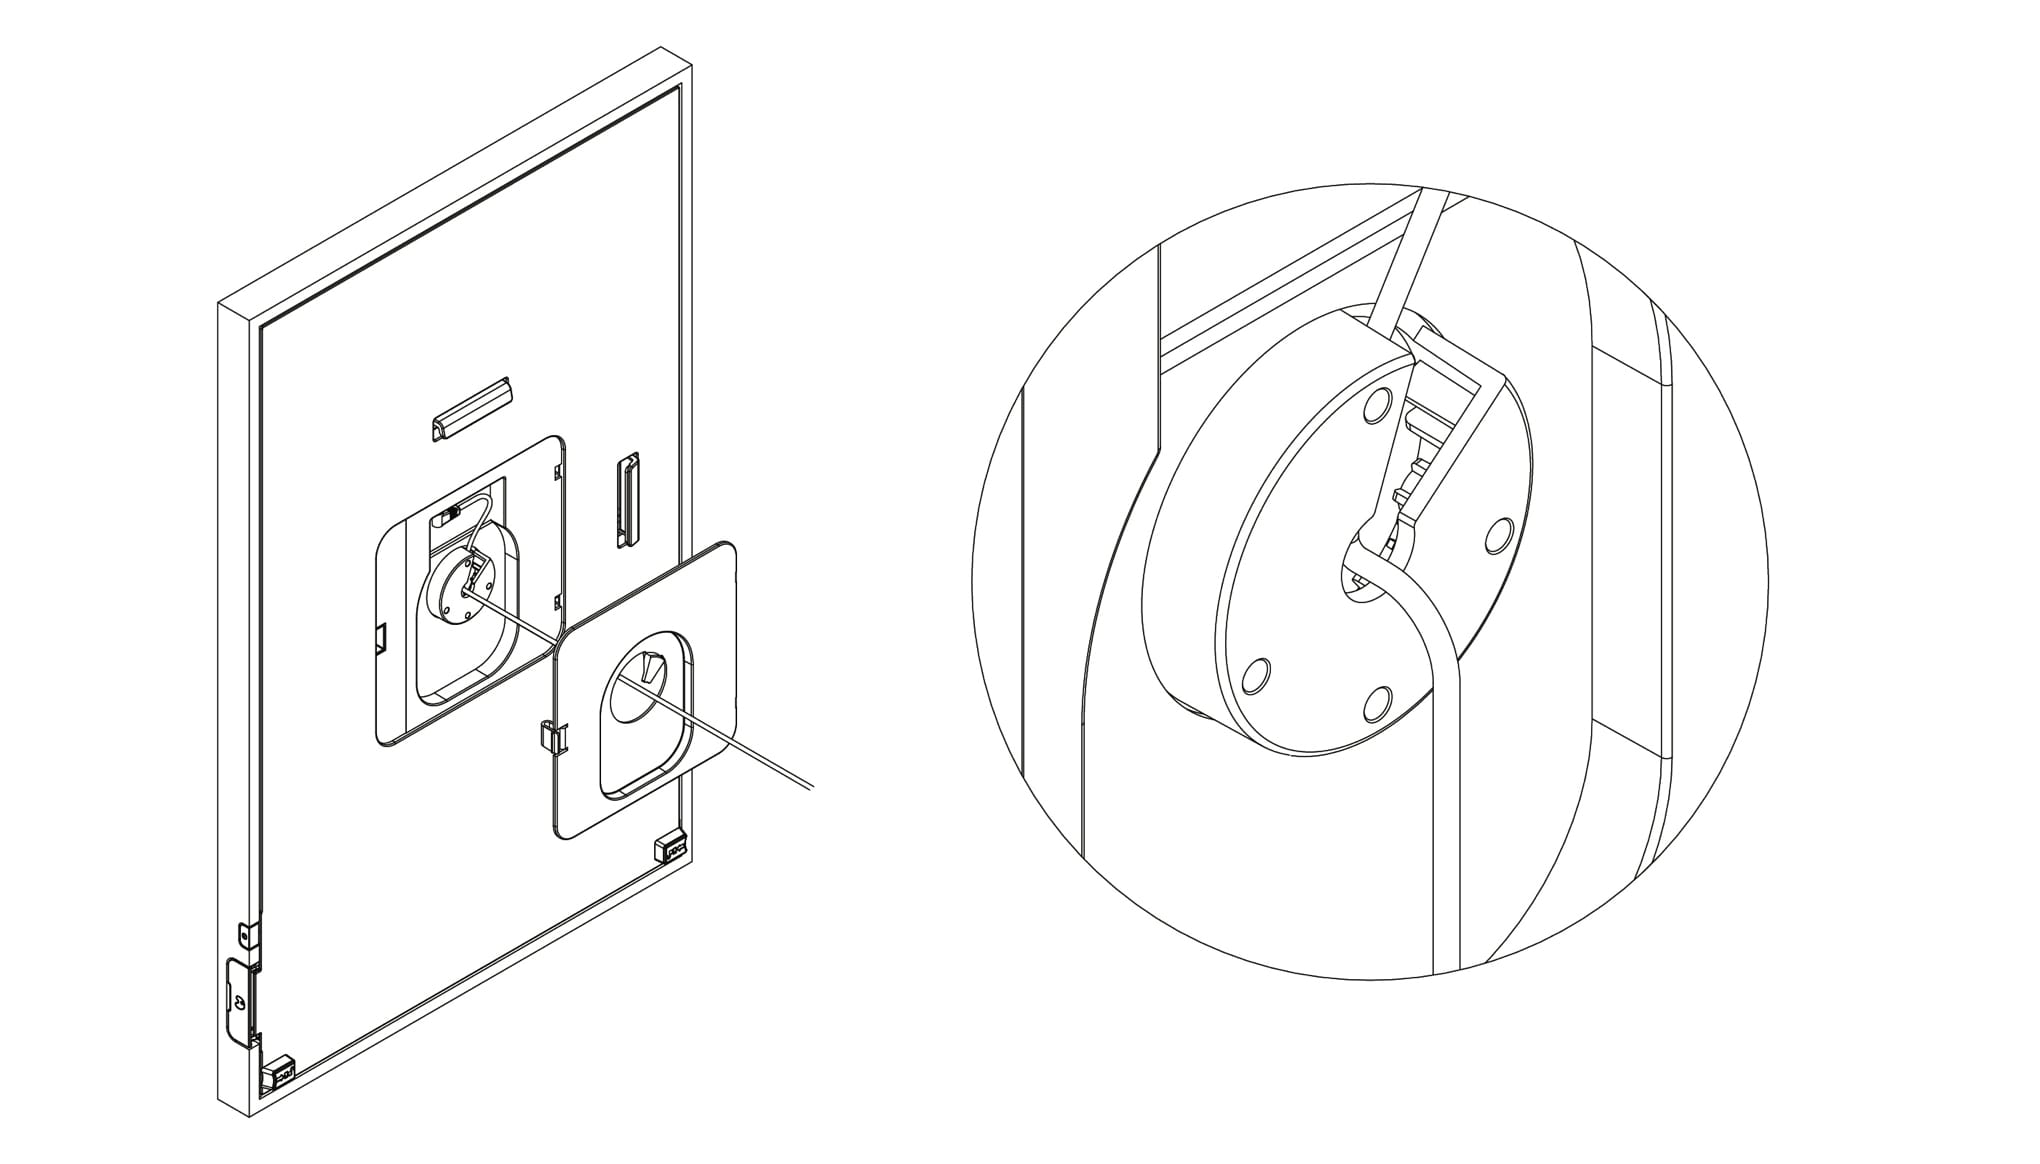
Replace the door. Insert the two tabs and then gently press to secure the tab. Position the cord so that it is held loosely in the hole in the center of the Canvas.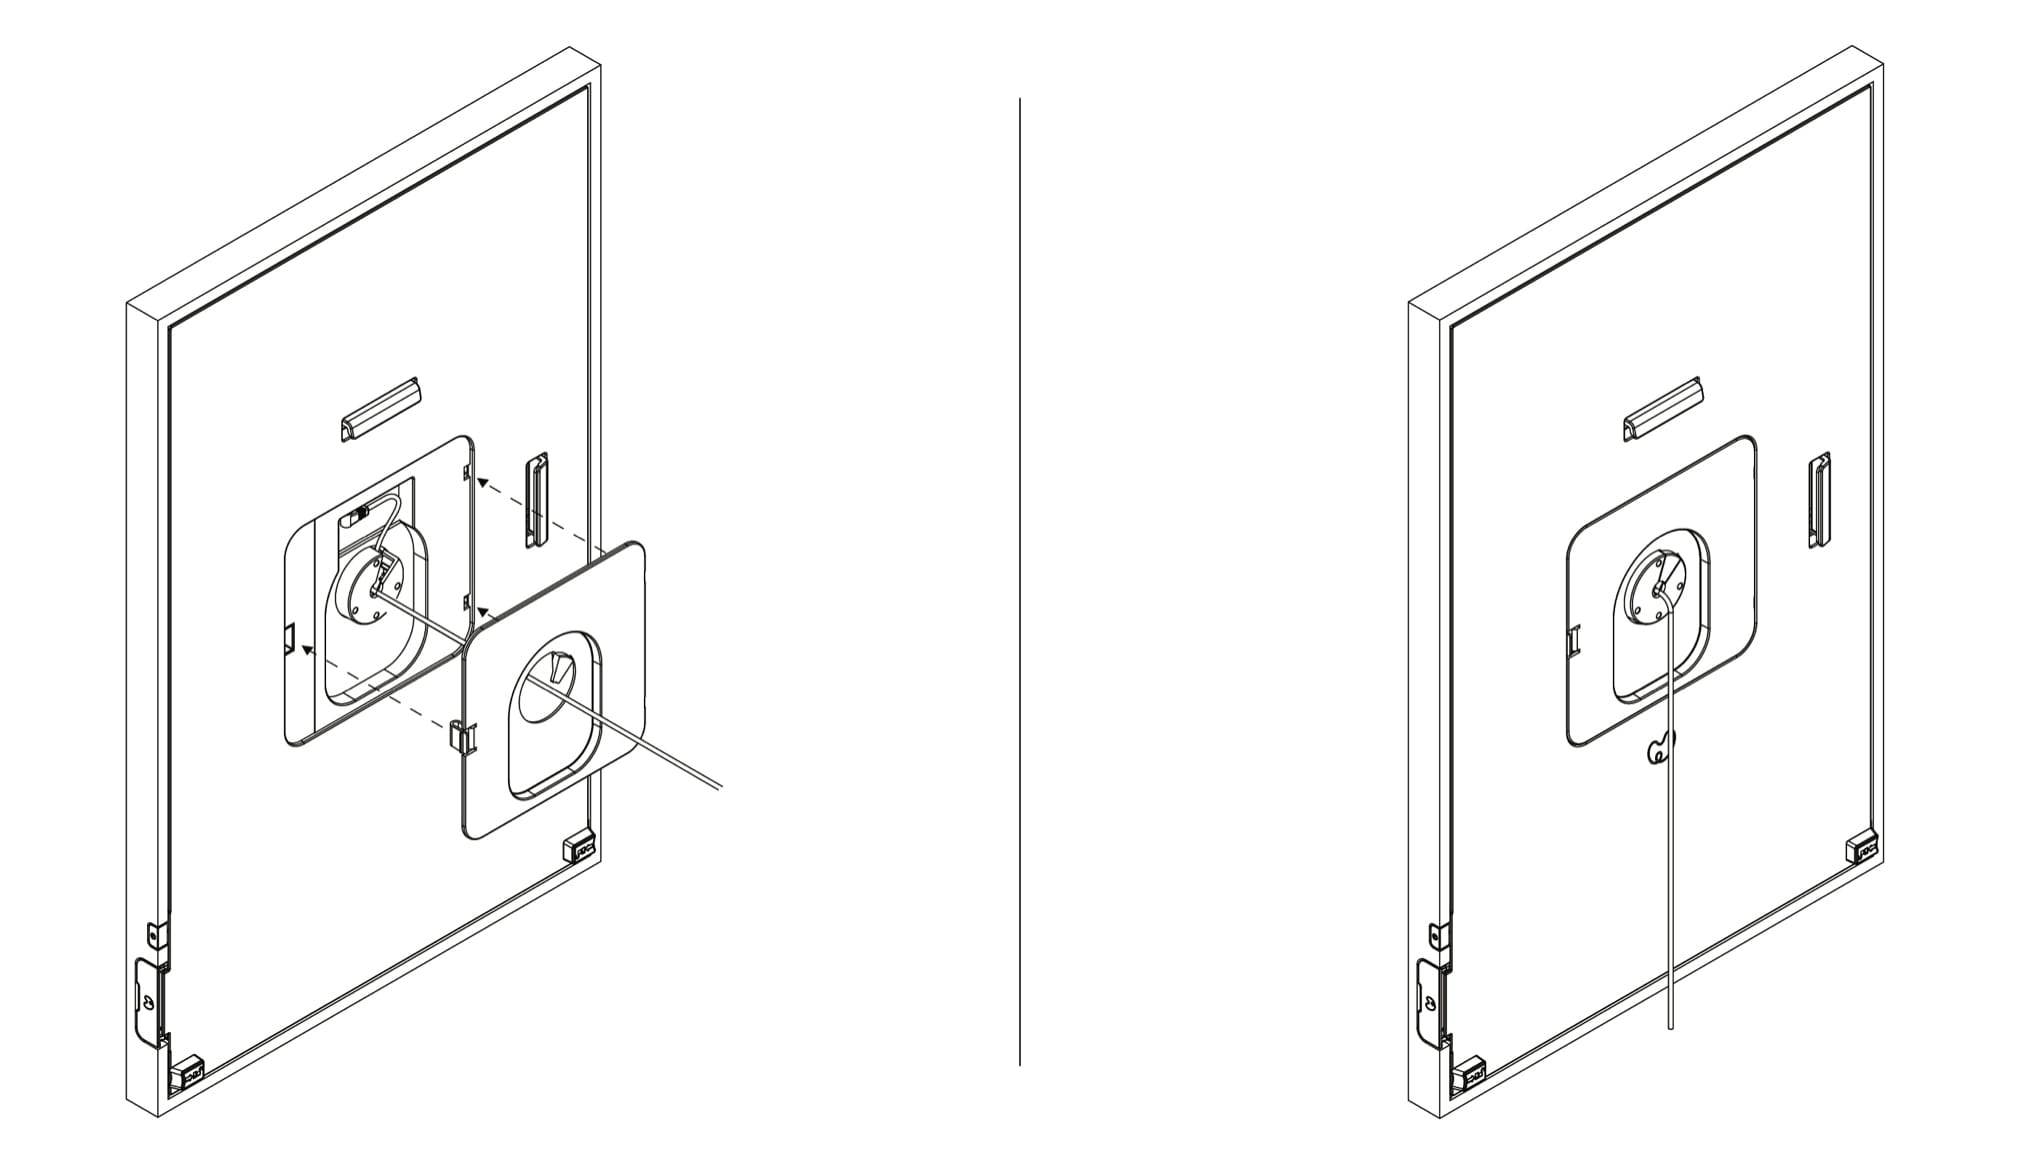
Step 9: Hang the Canvas
Hold the Canvas with the screen facing you. Place the Canvas against the wall and gently slide the hanging slot over the cleat. You may hang your Canvas in either its horizontal or vertical orientation. You can re-hang your Canvas in horizontal or vertical at any time (the Canvas will automatically detect its new orientation).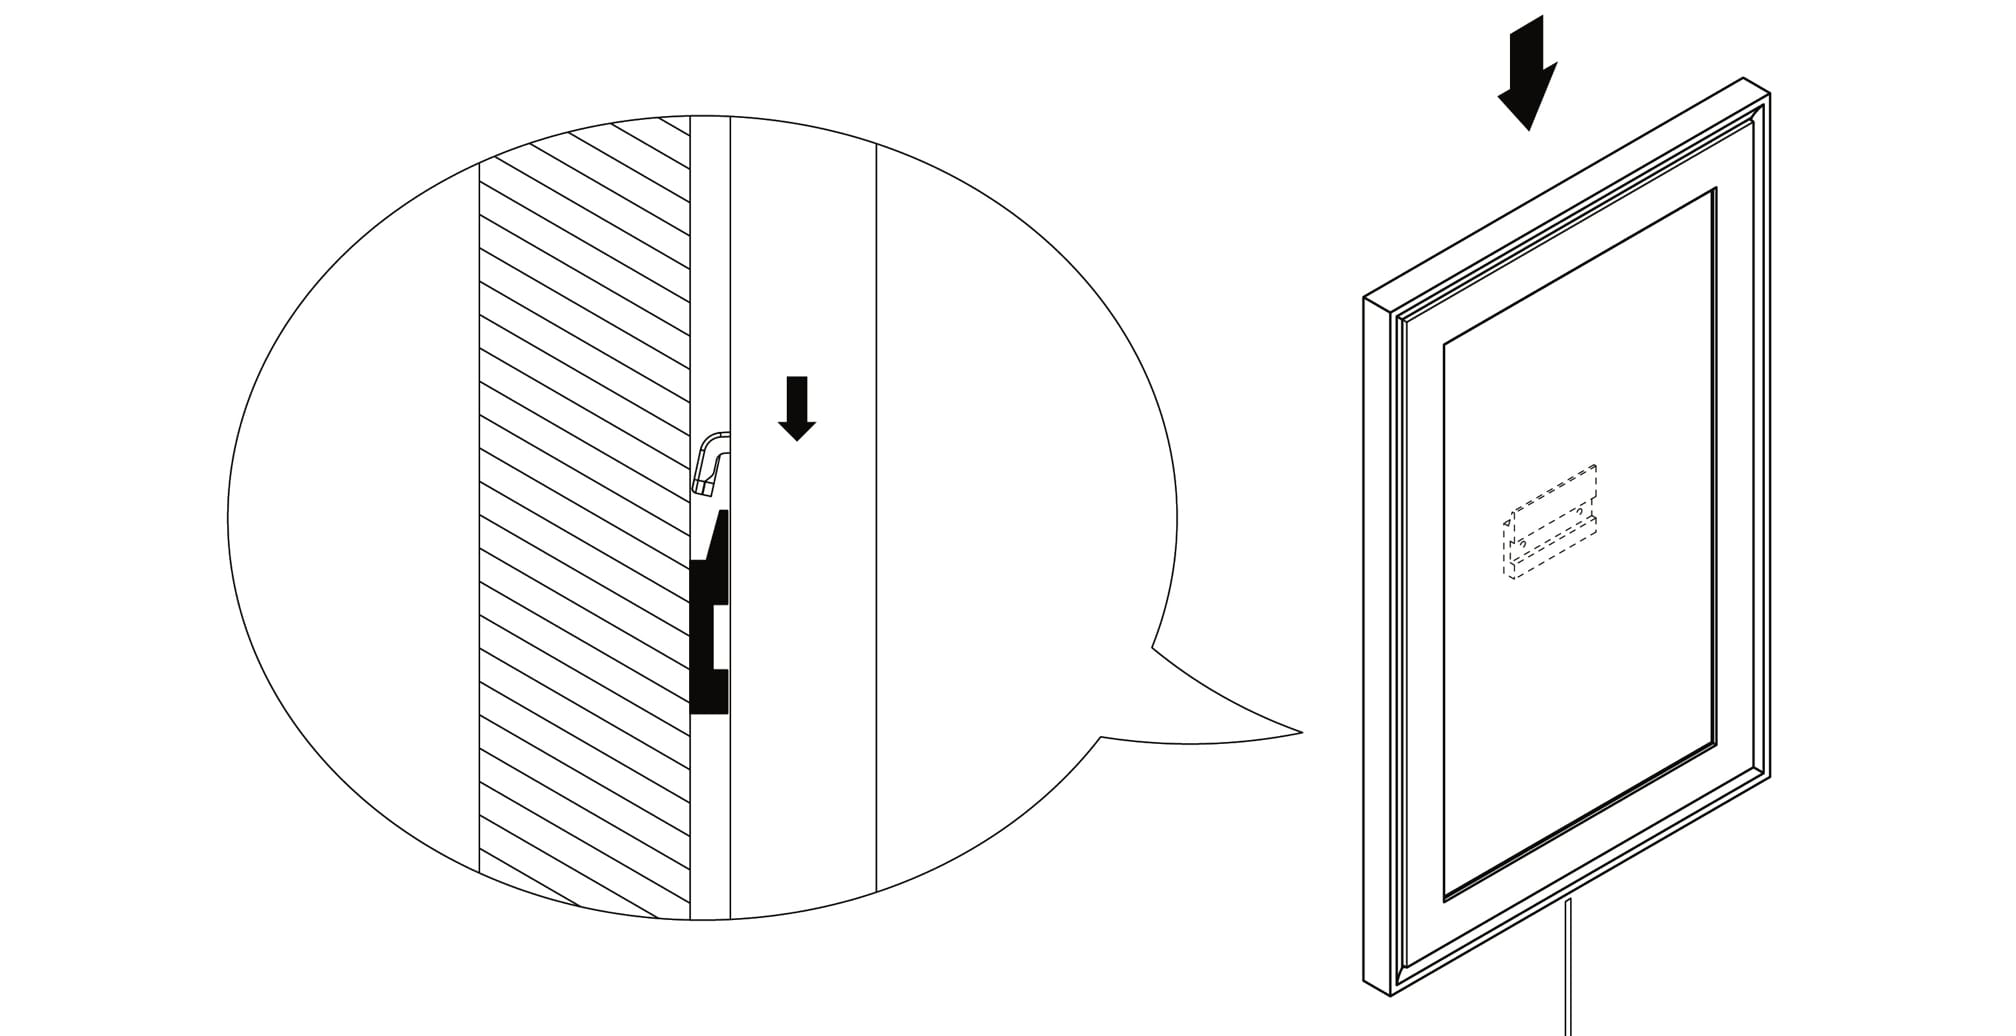
Step 10: Plug in the power adapter
Plug the power adapter into a standard outlet.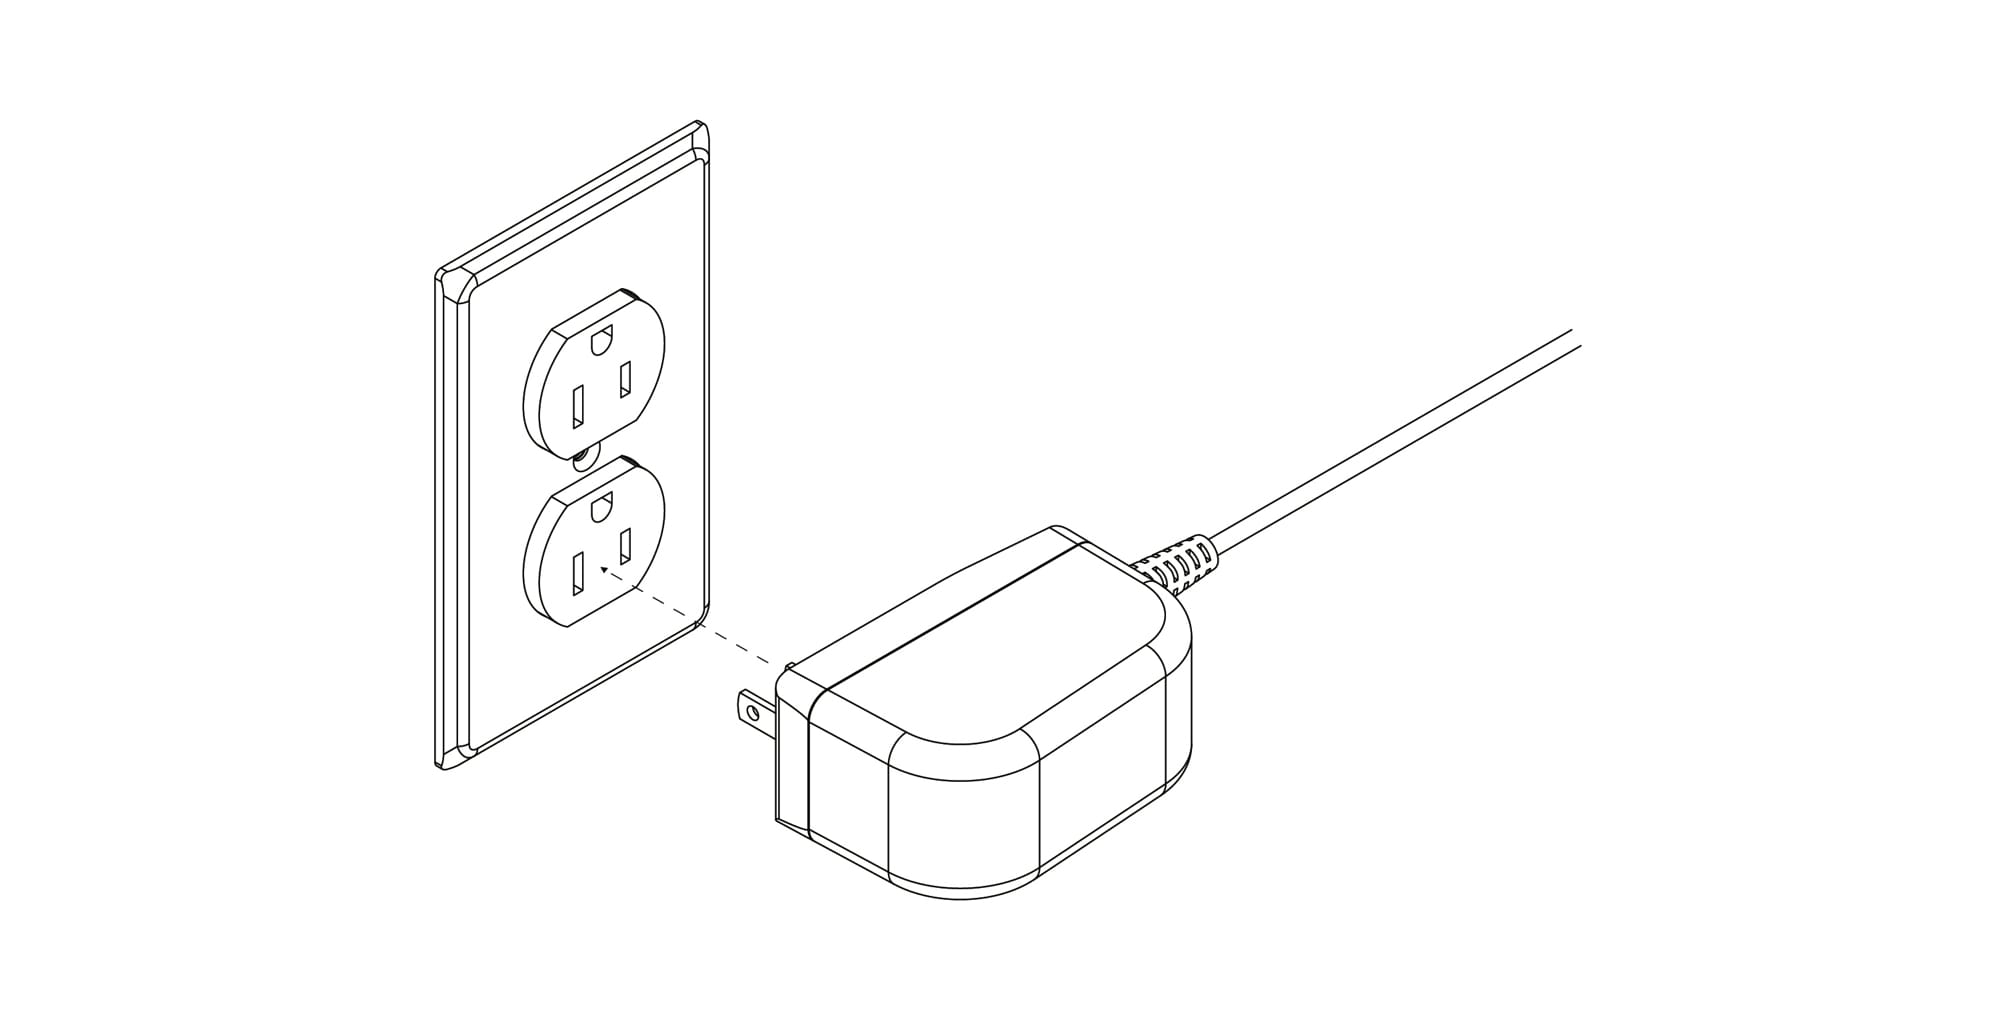
Hanging with the Swivel Mount
Step 1: Gather your supplies
You’ll need to get the following materials out of the box your Canvas came in:1. Meural Canvas2. Power adapter
You’ll need to get the following materials out of the swivel mount box: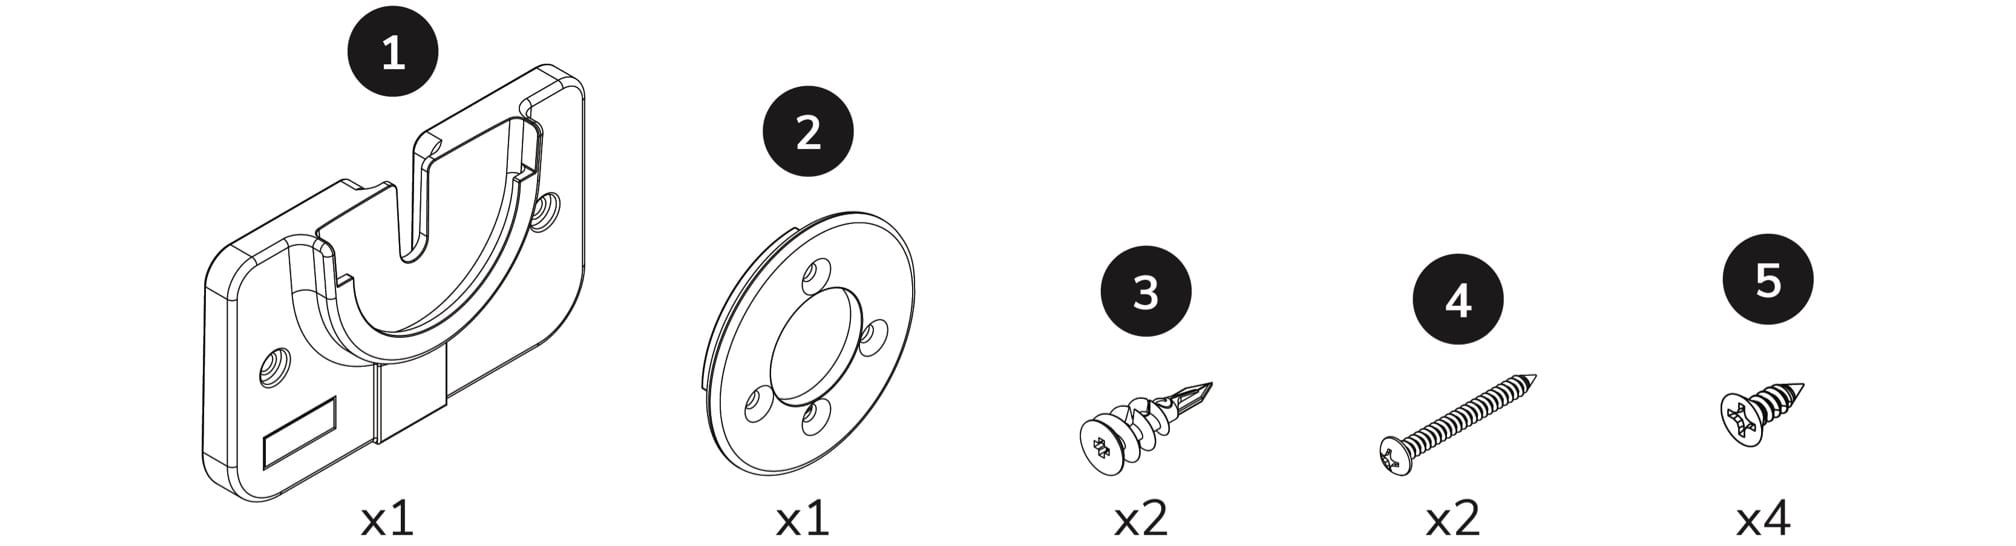
1. Wall mount extension2. Donut bracket3. Drywall anchors (2x)4. Anchor screws (2x)5. Donut screws (4x)
You'll also need these tools:
1. Phillips head screwdriver2. Hammer3. Power drill4. ⅜” drill bit5. Pencil6. Tape measure
Step 2: Measure
After you choose a spot to hang your Canvas, use your tape measure and pencil to mark the desired height from the floor. We recommend hanging the Canvas so its center is at around 60 inches from the floor—the gallery standard.Step 3: Place the wall mount
Place your wall mount against the wall and align the holes over your mark. Use the included bubble level to make sure the wall mount is level.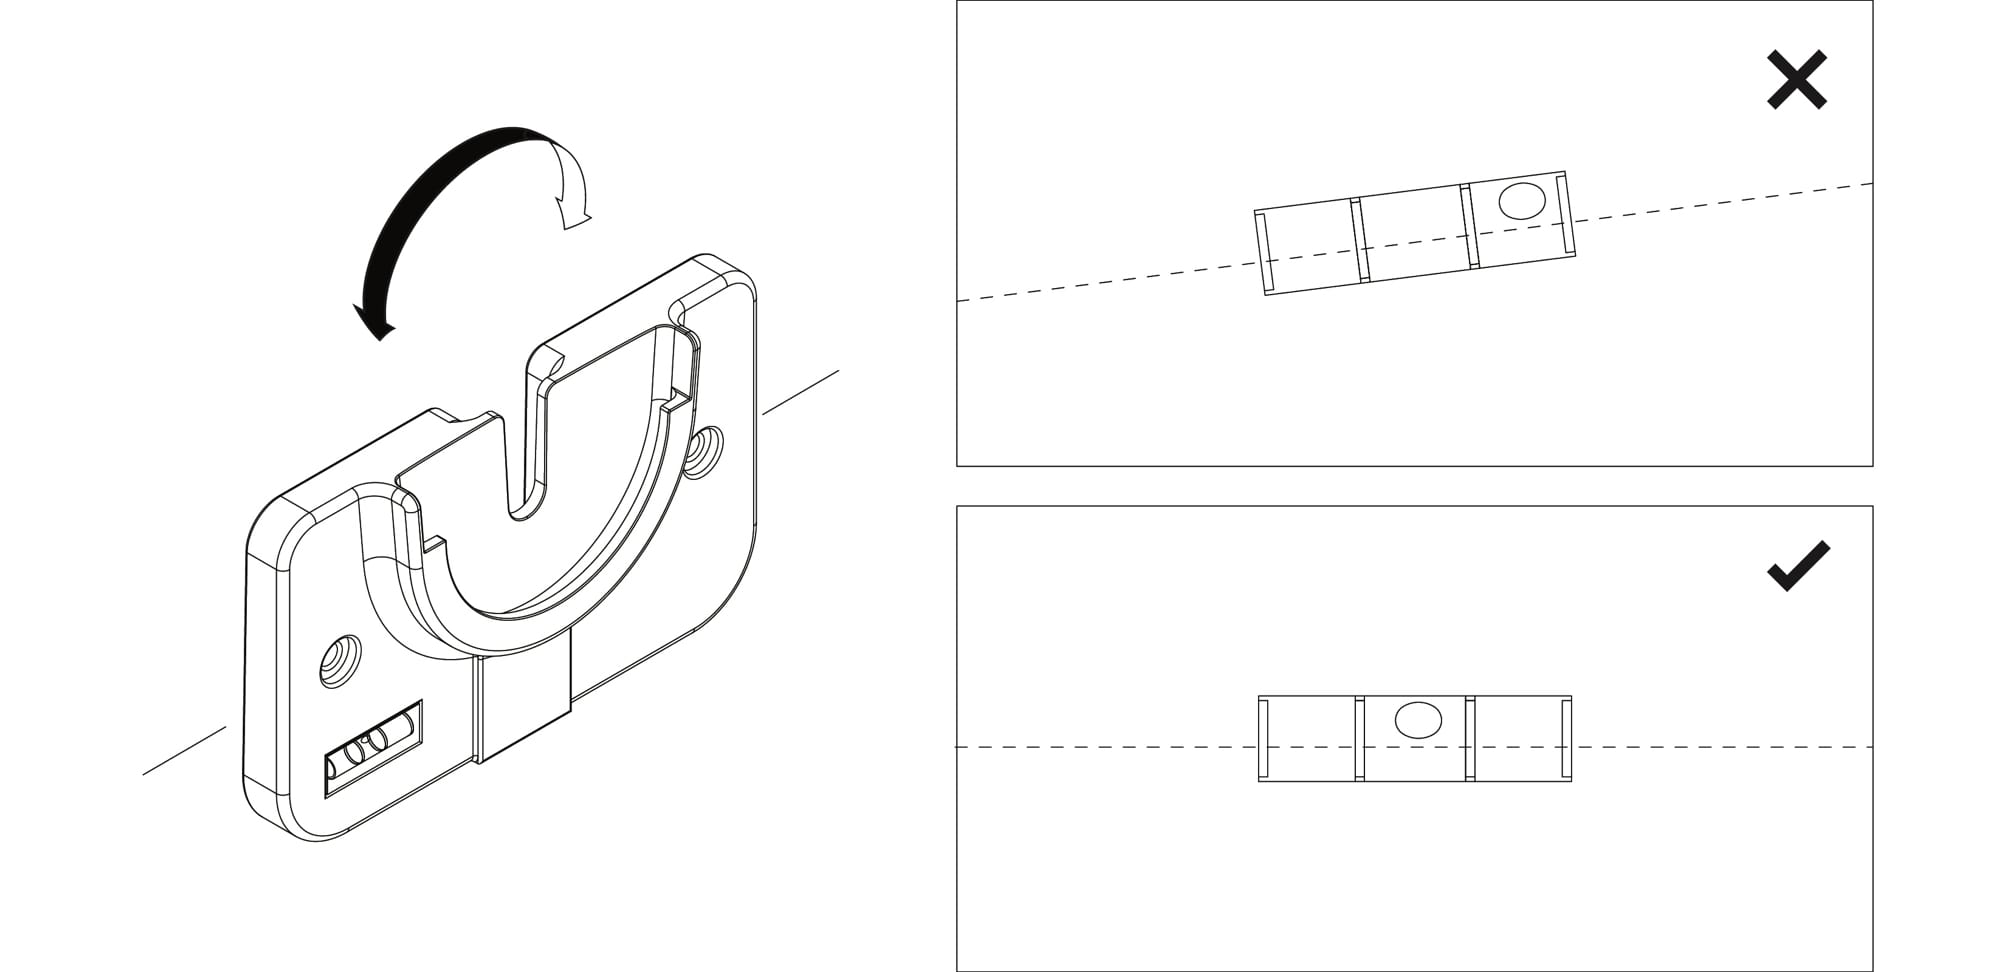
Step 4: Mark the holes
Use your pencil to mark the center of the holes. Once you’ve marked the holes, set the pencil and wall mount aside.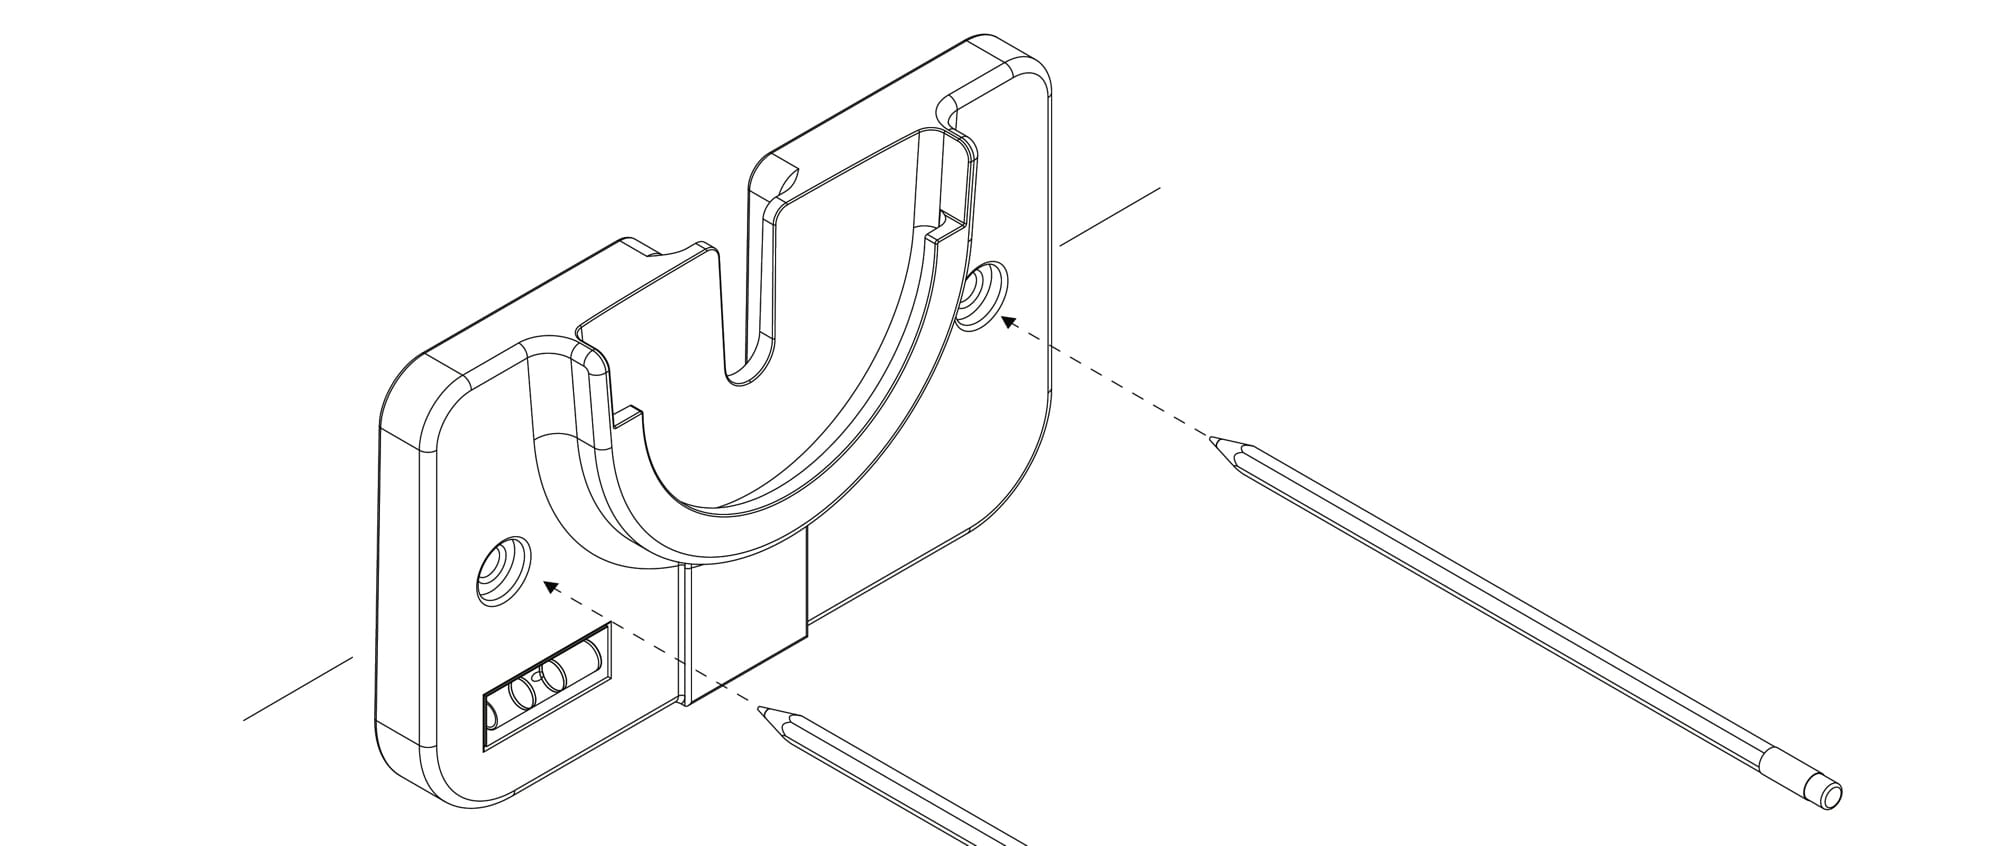
Step 5: Drill the holes
Use a drill with a ⅜ inch drill bit to drill the holes centered on the two pencil marks. You’ll need to drill about 2 ½ inches deep (or all the way through the drywall).Step 6: Insert the anchors
Using a hammer, gently tap the two included anchors all the way through the two holes.Step 7: Install the wall mount
Position the wall mount with the holes aligned with the anchors. Using a Phillips head screwdriver, screw the screws through the holes in the wall mount and into the anchors.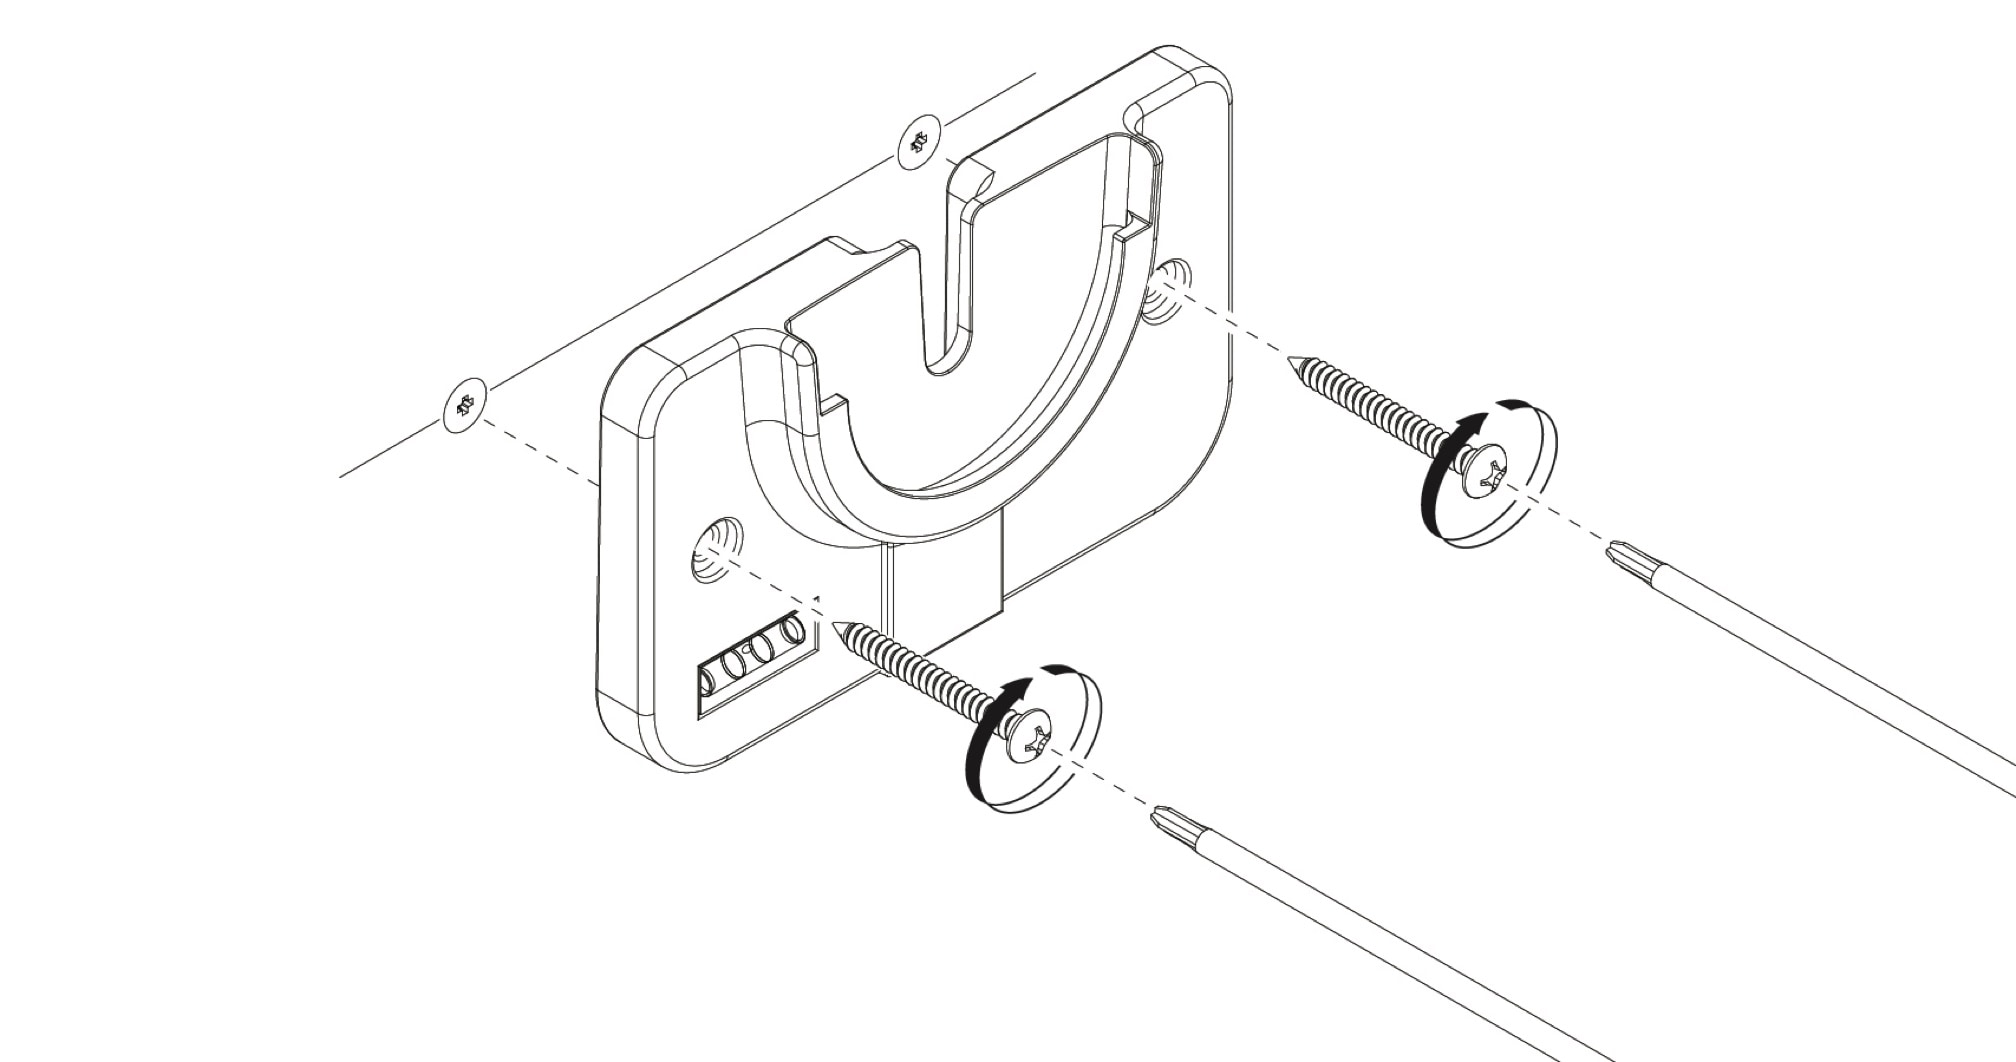
Step 8: Run the cord through the wall mount
Thread the cord (from top to bottom) through the wall mount, and slide the wall mount into the wall mount extension.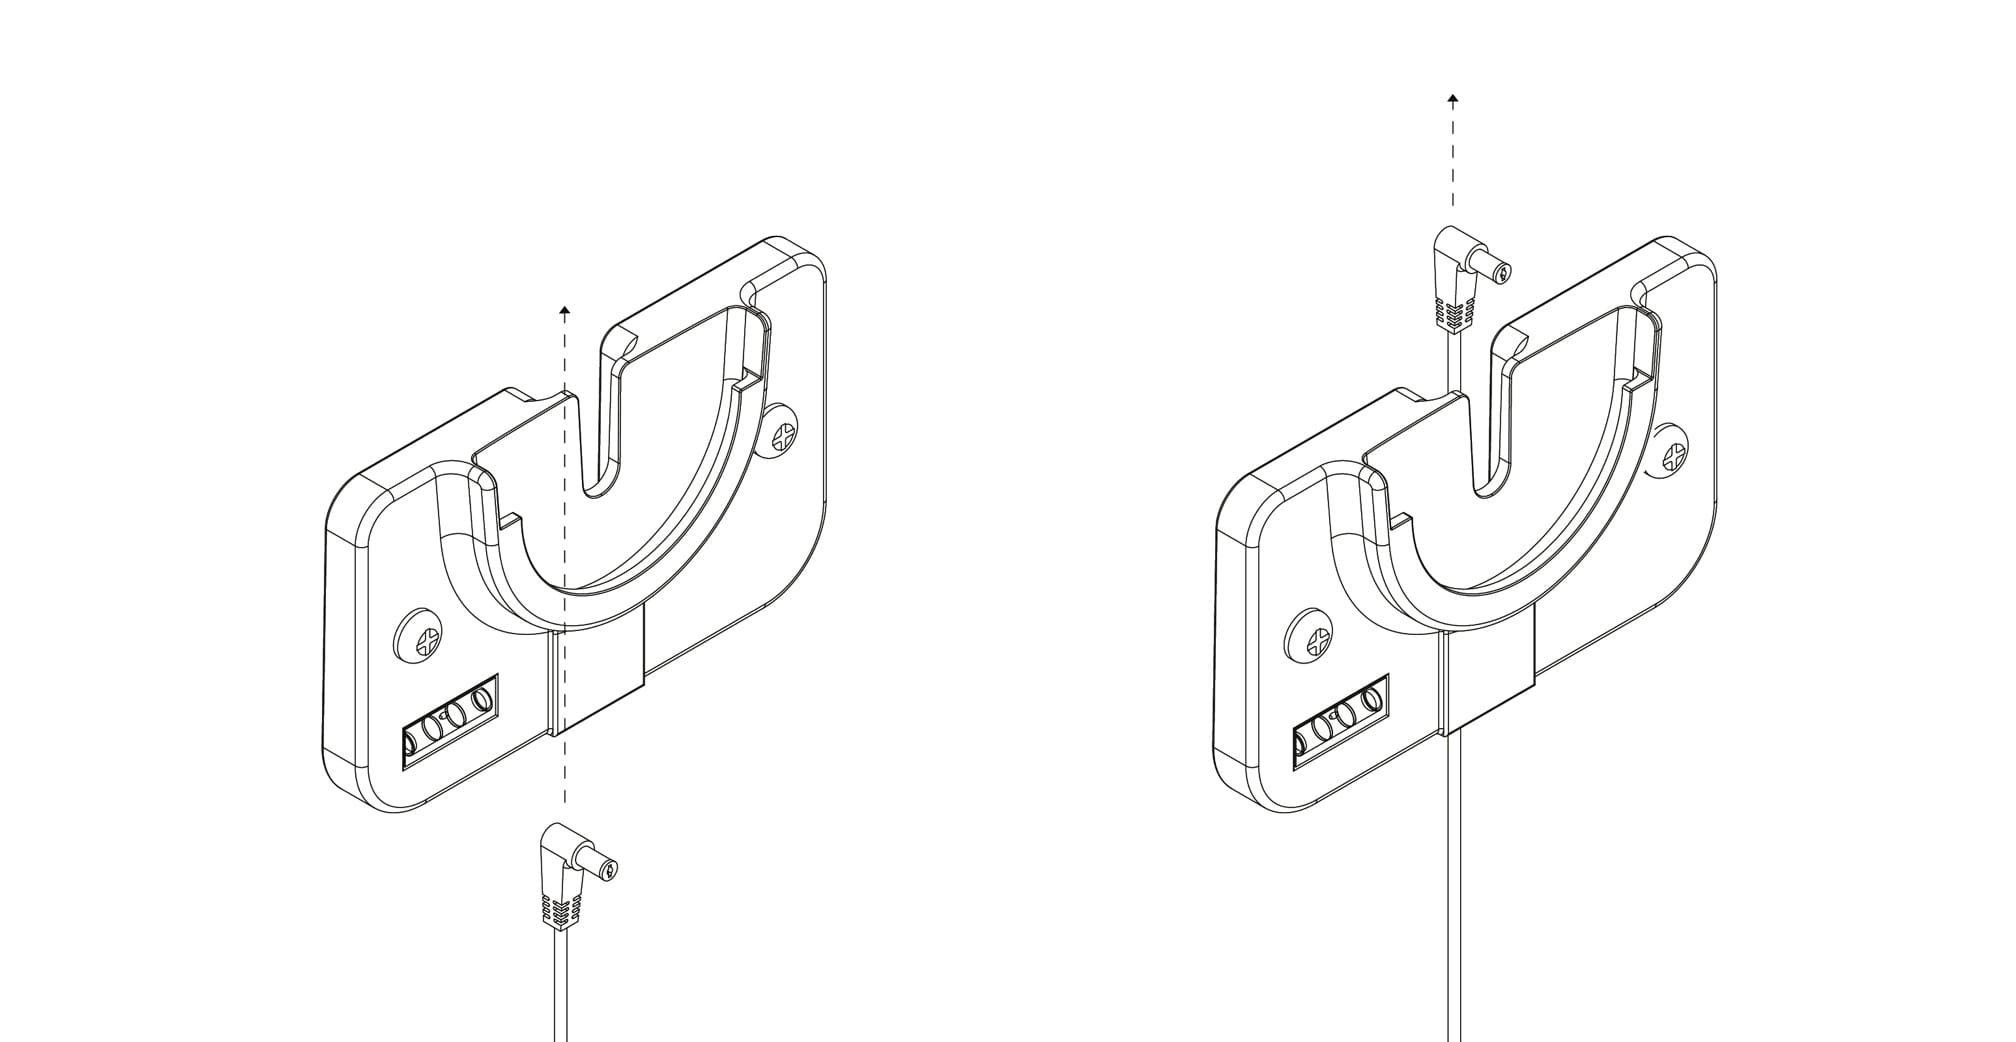
Step 9: Plug in the Canvas
Lean the Canvas up against a wall or chair with the back facing you. Gently press the tab on the back of the Canvas and remove the plastic door.Run the small end of the cord through the hole in the plastic door and the center of the swivel mount donut. Plug the small end of the included power adapter into the hole indicated in the diagram.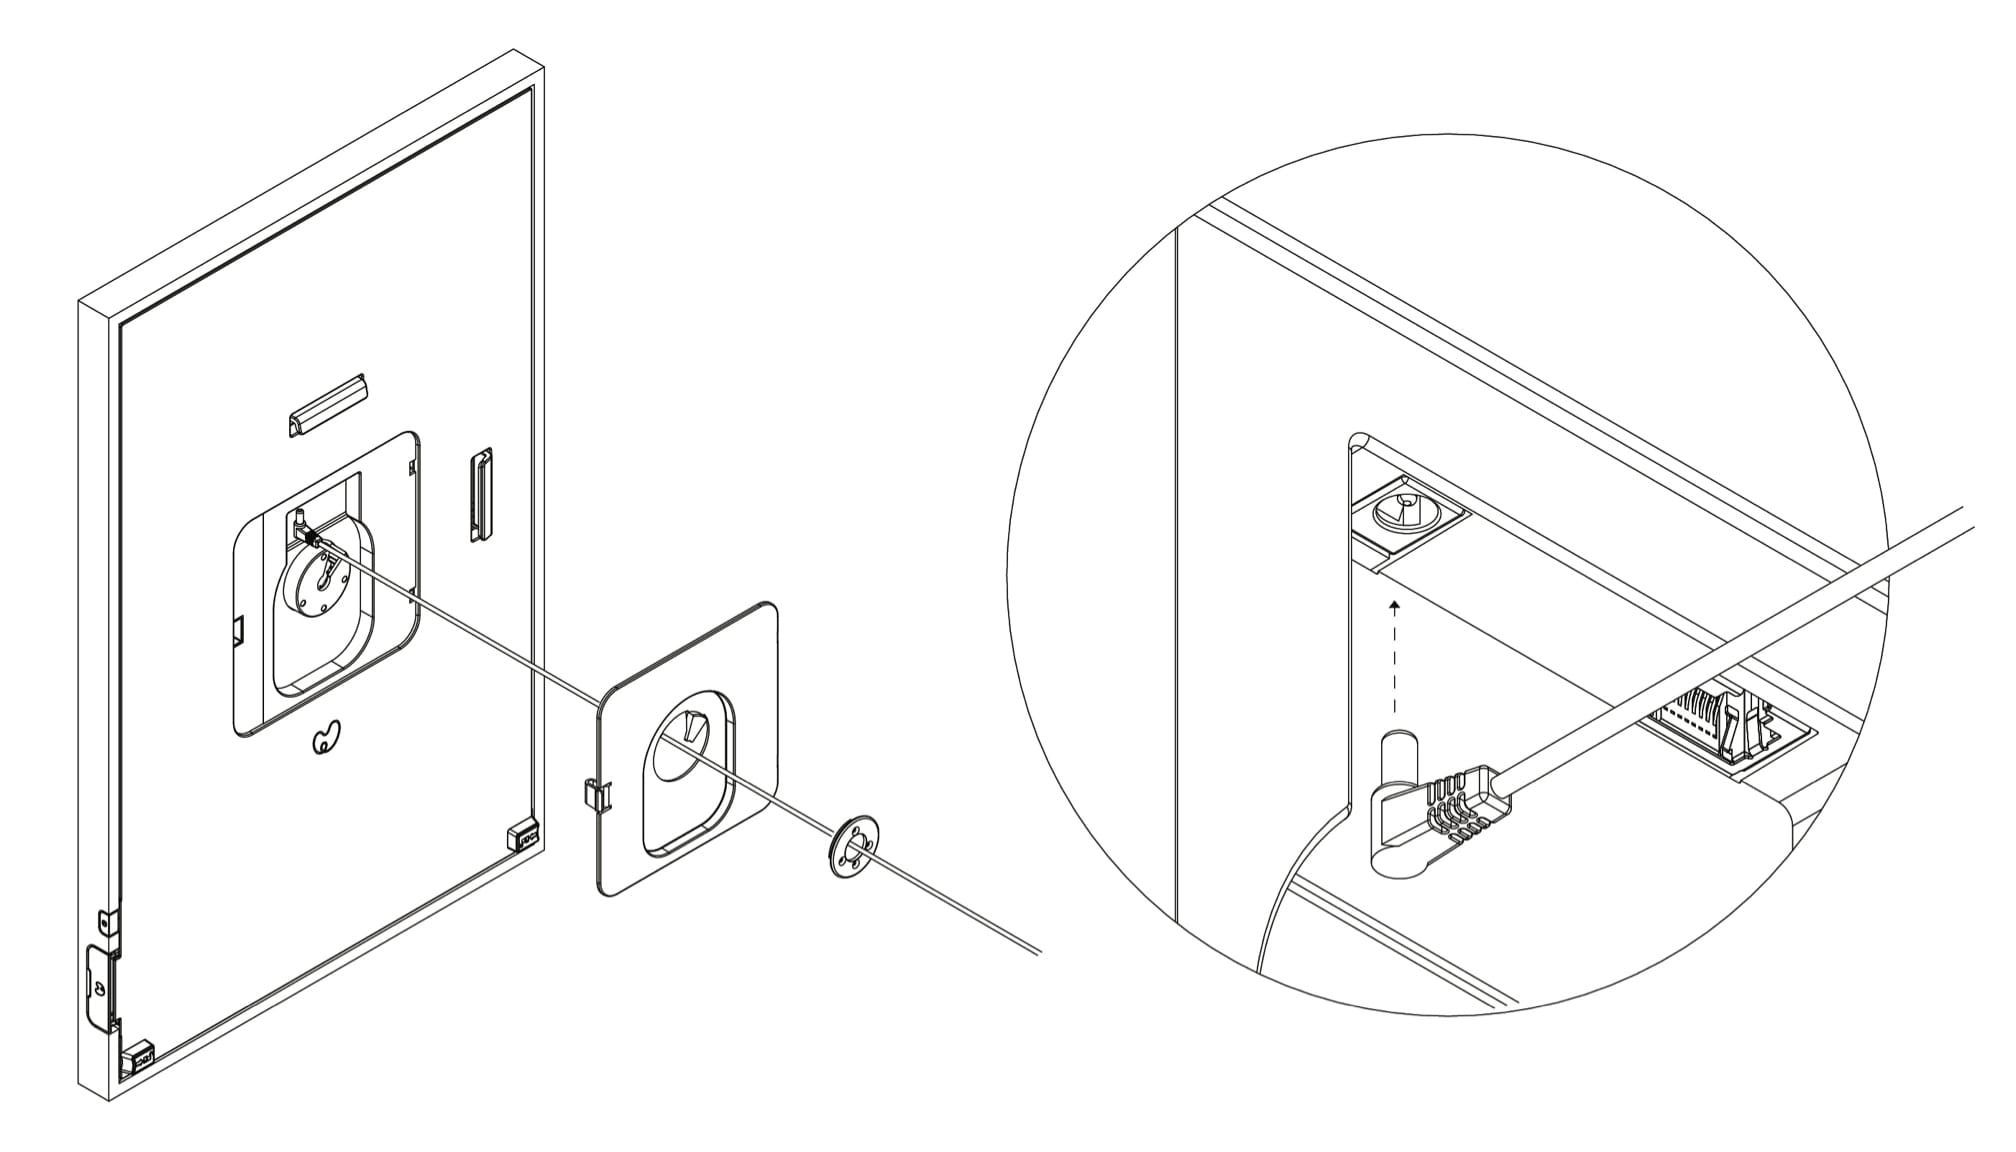
Position the cord so that it runs through the V-shaped opening in the center of the Canvas.
Replace the door. Insert the two tabs and then gently press to secure the tab. Position the cord so that it is held loosely in the hole in the center of the Canvas.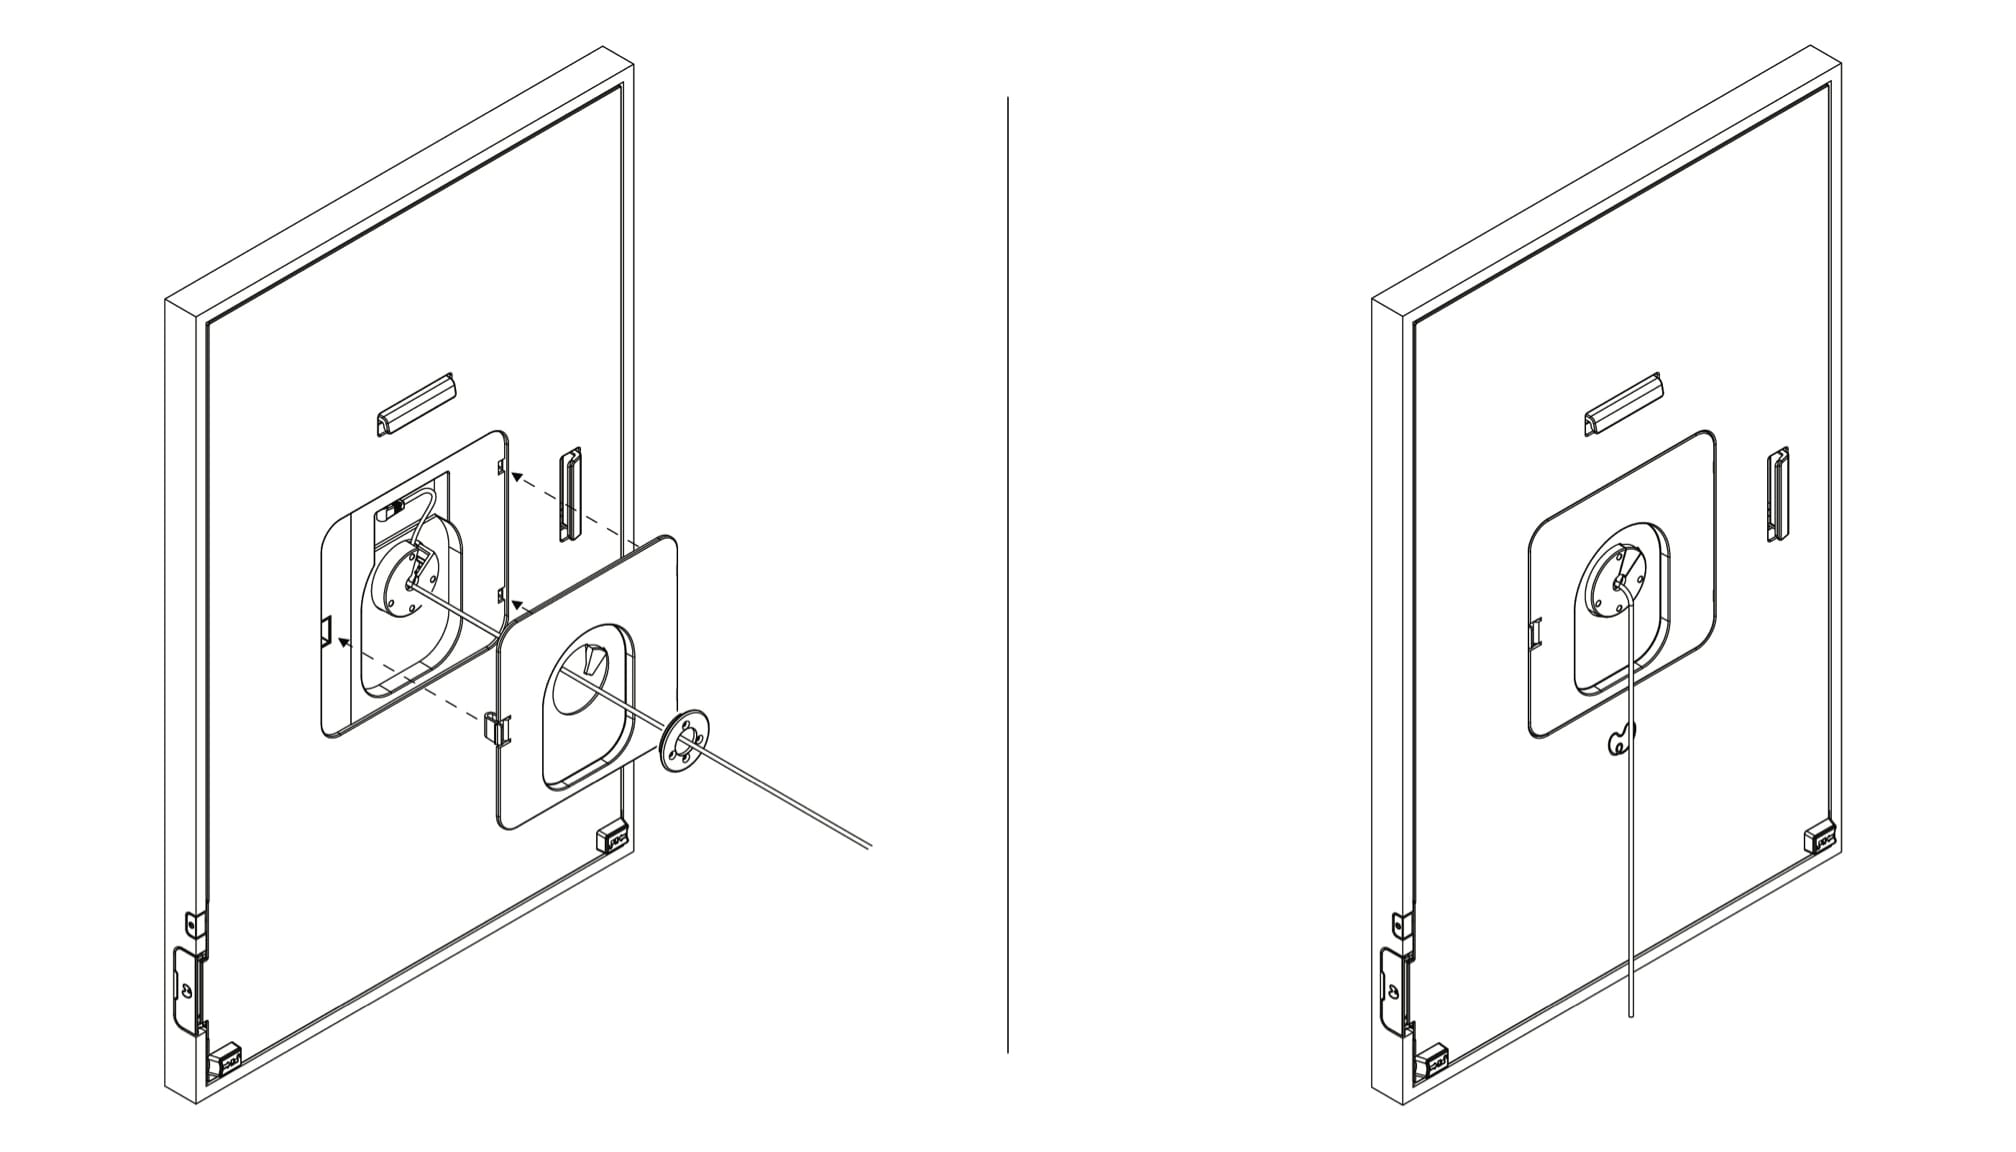
Step 10: Attach the donut
Place the donut against the backplate of your Canvas. Use a Phillips head screwdriver to screw the four screws into the donut, securing it tightly.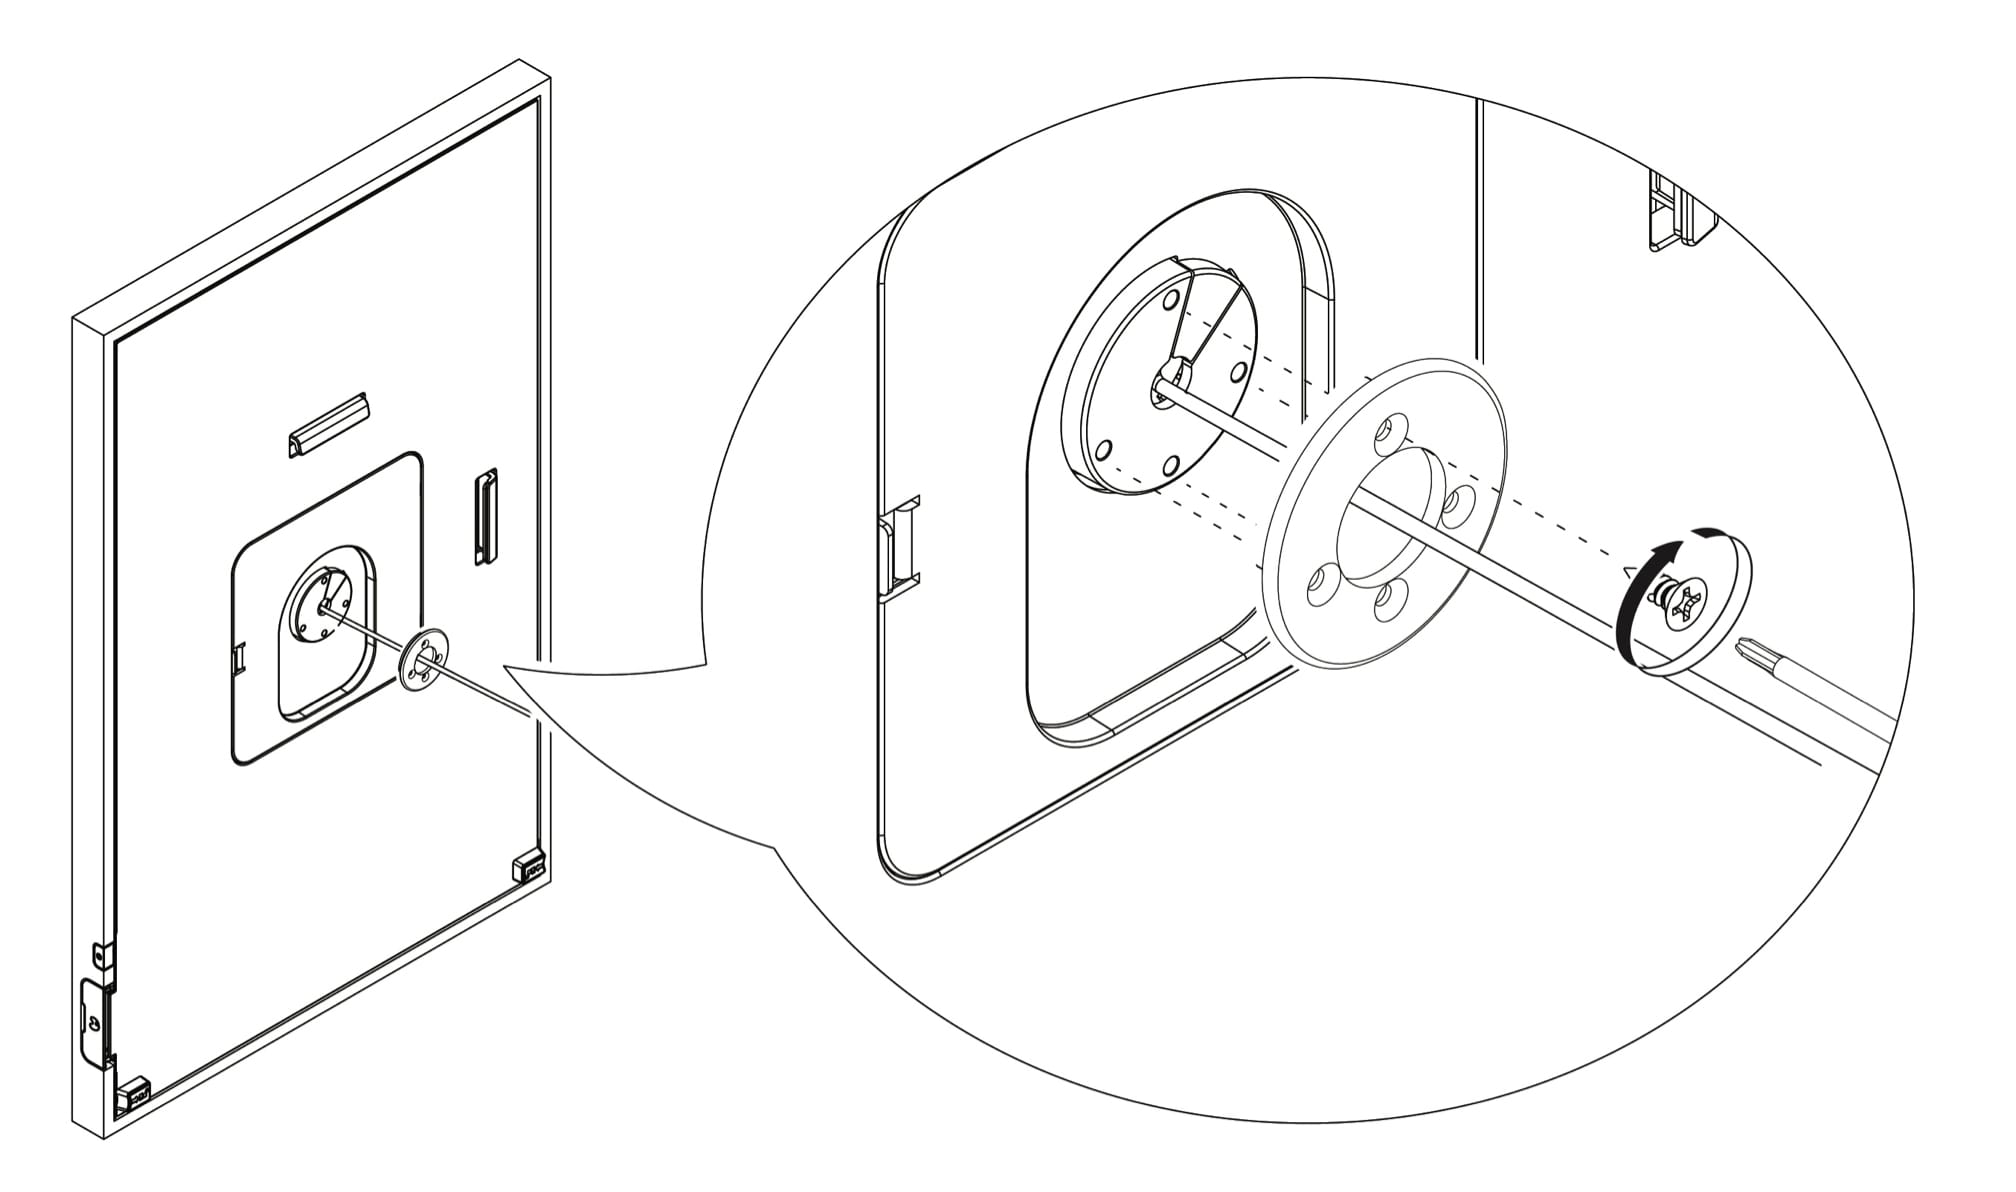
Step 11: Hang the Canvas
Hold the Canvas with the screen facing you. Place the Canvas against the wall and gently slide the hanging slot over the cleat.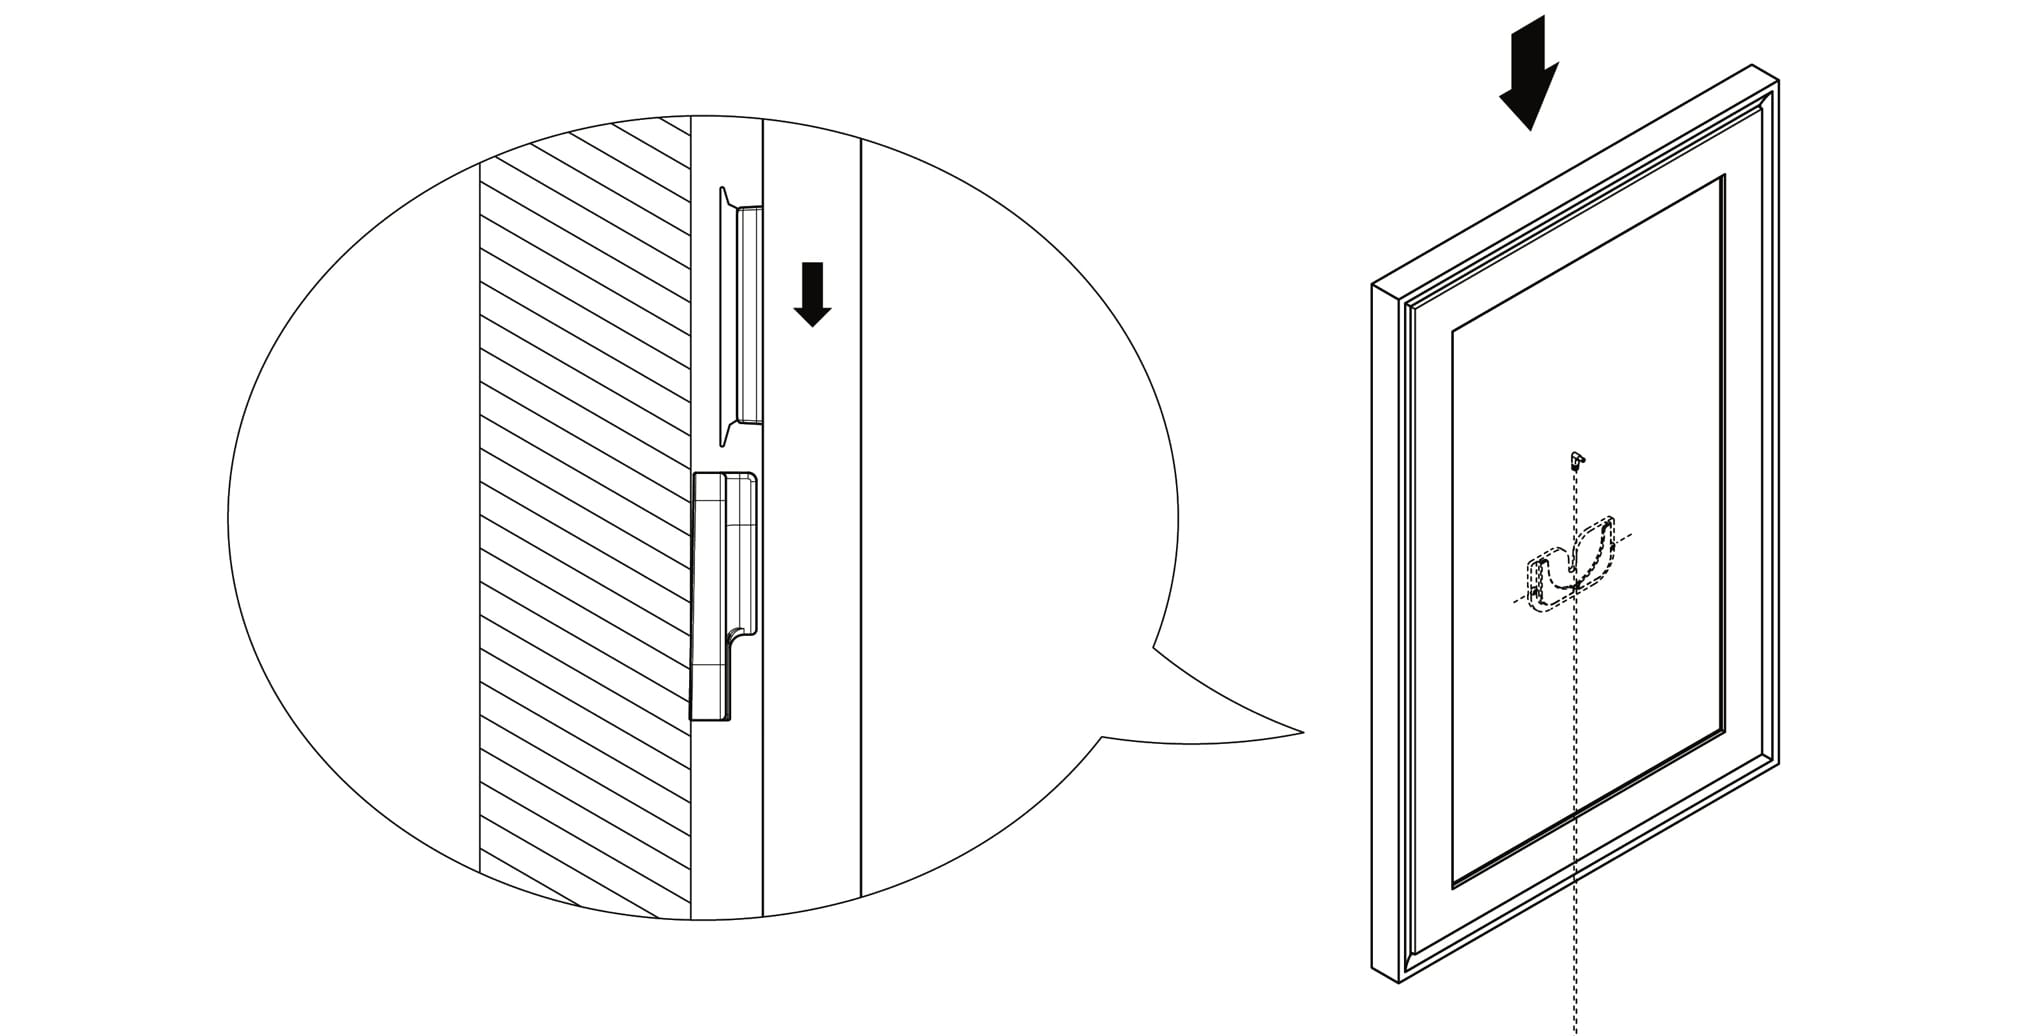
Step 12: Plug in the Canvas
Plug the power adapter into a standard outlet.Step 13: Power cable management
Rotating the Canvas
With the Swivel Mount, you can rotate your Canvas without removing it from the wall. Simply rotate 90° clockwise from vertical to horizontal, and 90° counterclockwise from horizontal to vertical. Your Canvas will detect which way it’s hanging and automatically change orientation.Be careful: The Canvas does not spin 360°, so please don’t force it to turn further than 90°.'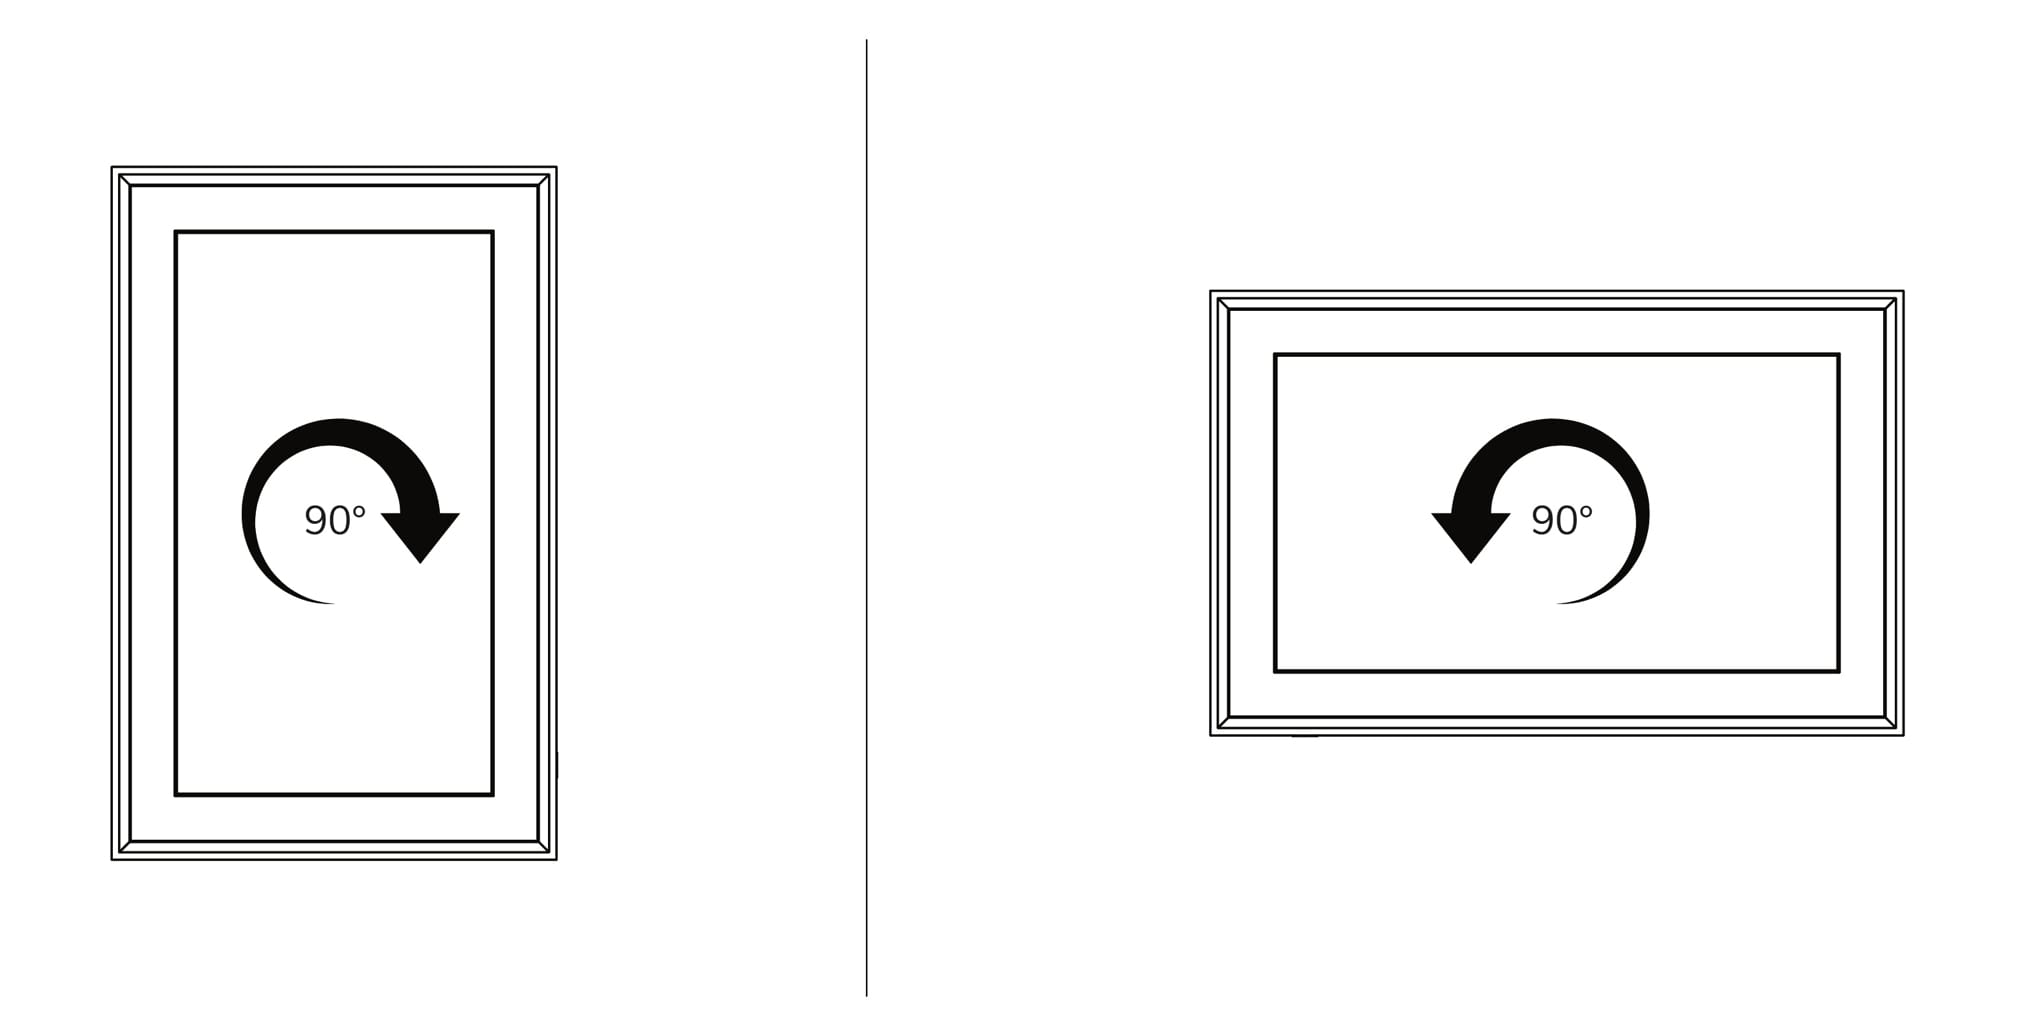 1. TO THE EXTENT PERMISSIBLE BY APPLICABLE LAW, NETGEAR DISCLAIMS ALL LIABILITY WHATSOEVER RELATED TO THE REMOVAL OR CHANGING OF THE FRAME ON YOUR MEURAL CANVAS. YOU ASSUME ANY AND ALL RISKS ASSOCIATED WITH THE REMOVAL OR CHANGING OF THE FRAME ON YOUR MEURAL CANVAS, INCLUDING WITHOUT LIMITATION, FIRE, DAMAGE TO PROPERTY, BODILY INJURY, AND/OR DEATH. TO THE EXTENT PERMISSIBLE BY APPLICABLE LAW, FAILURE TO FOLLOW THESE WARNINGS AND/OR DIRECTIONS COULD RESULT IN DAMAGE TO YOUR MEURAL CANVAS THAT WILL NOT BE COVERED BY NETGEAR’S WARRANTY. NETGEAR IS NOT RESPONSIBLE FOR ANY FAILURE TO FOLLOW THESE GUIDELINES.
Up next: